Magnifico=Magnificent

May 7th, 2013

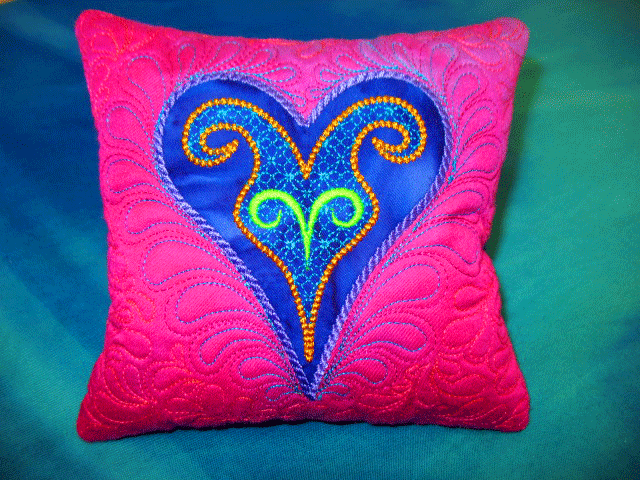
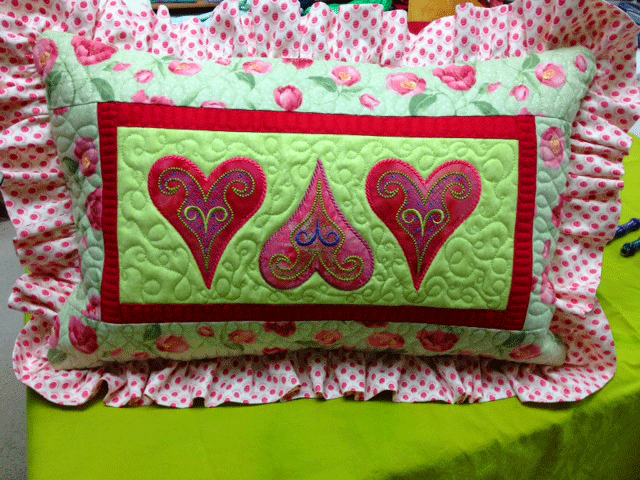
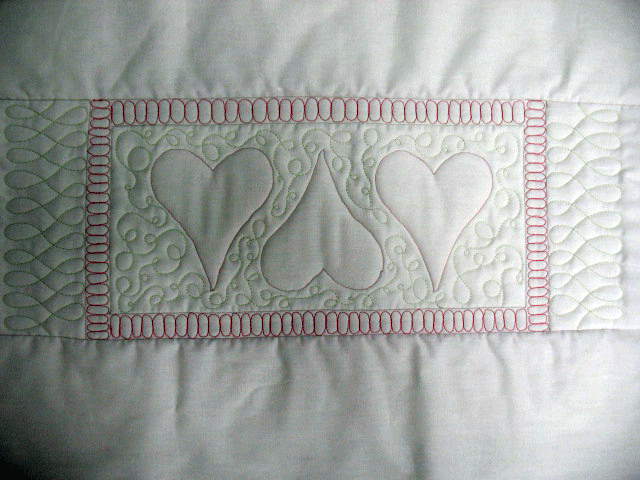
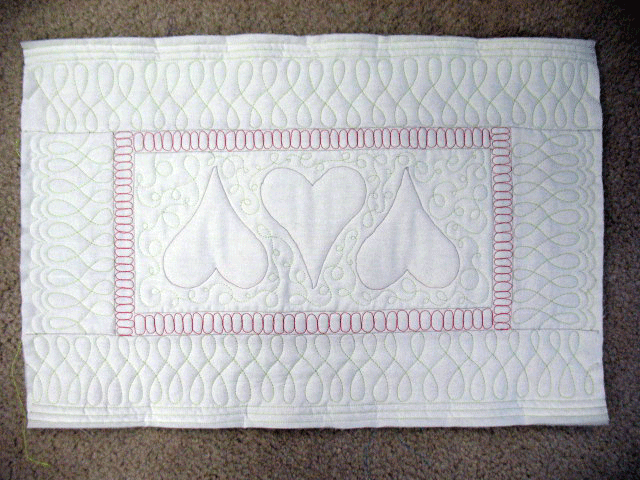
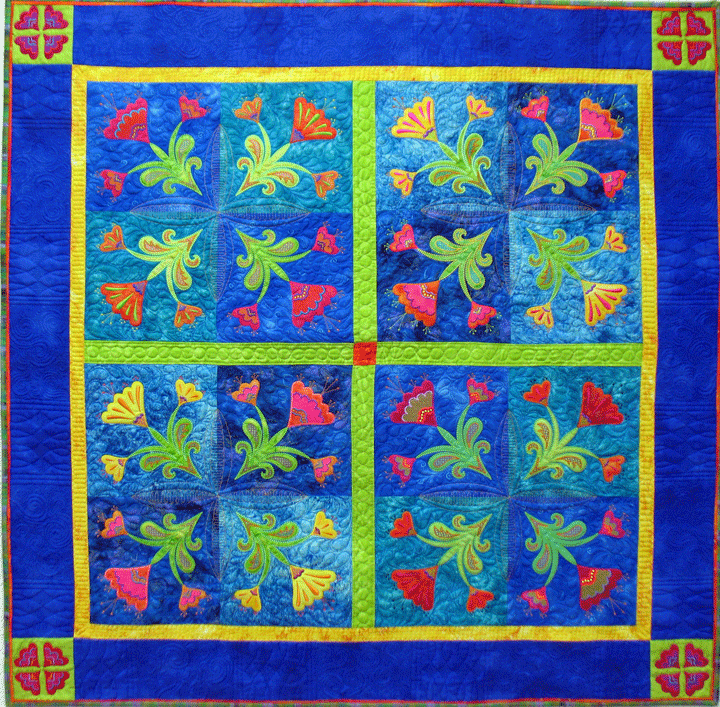
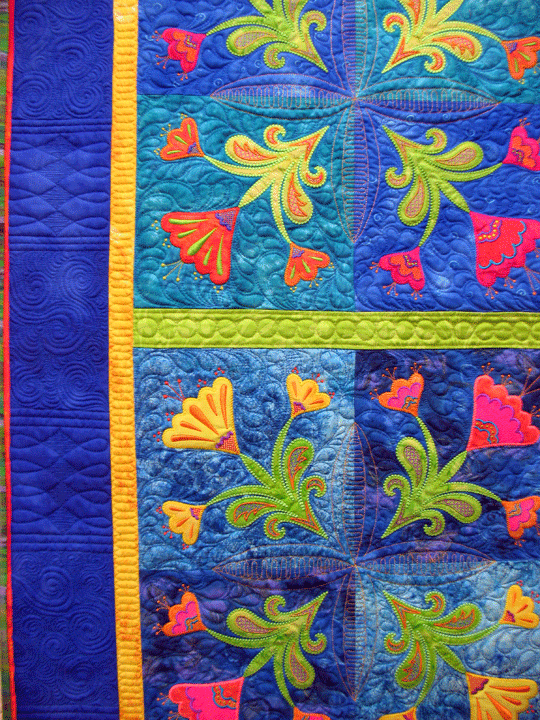
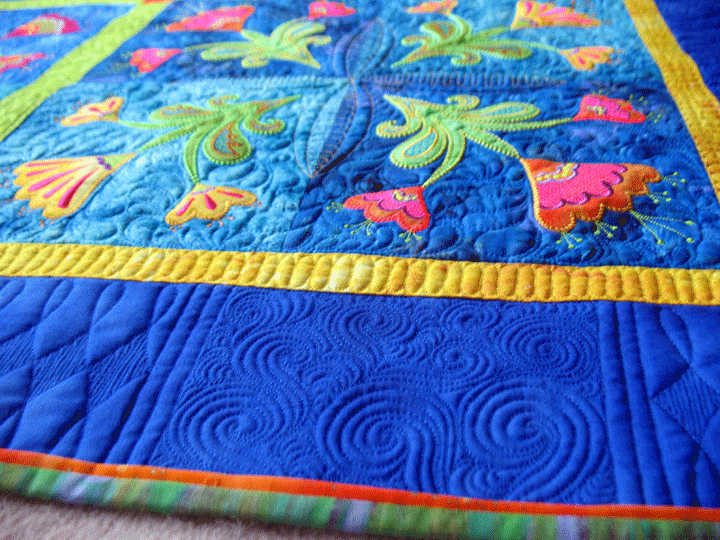
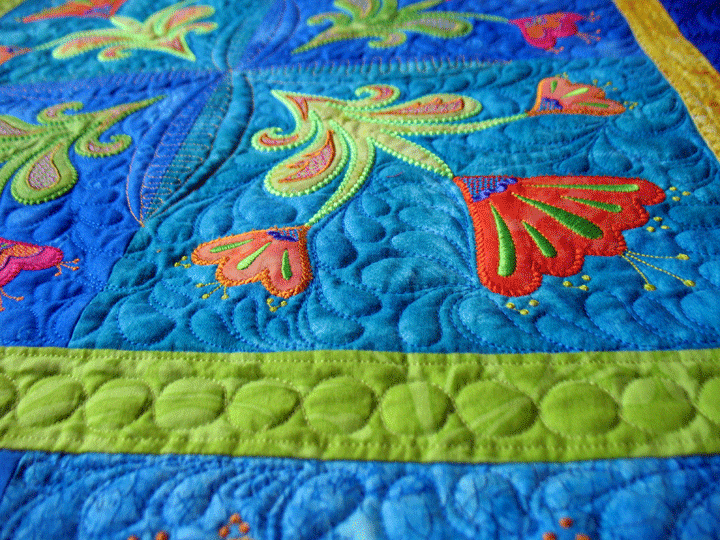
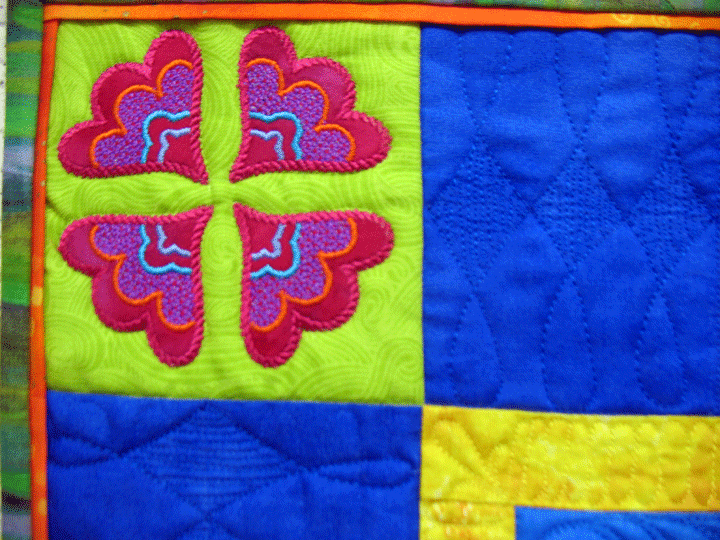
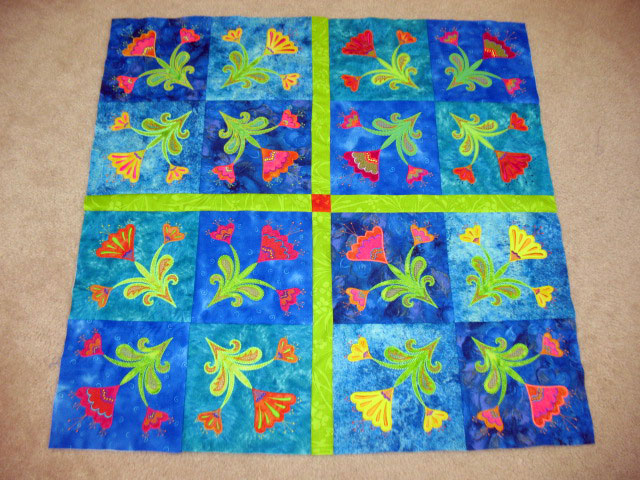
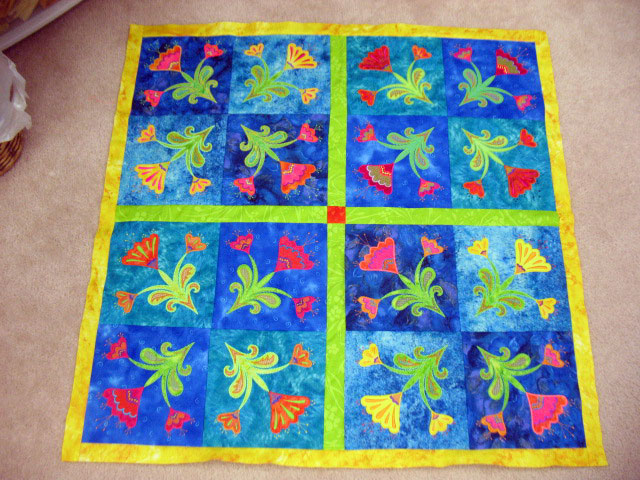
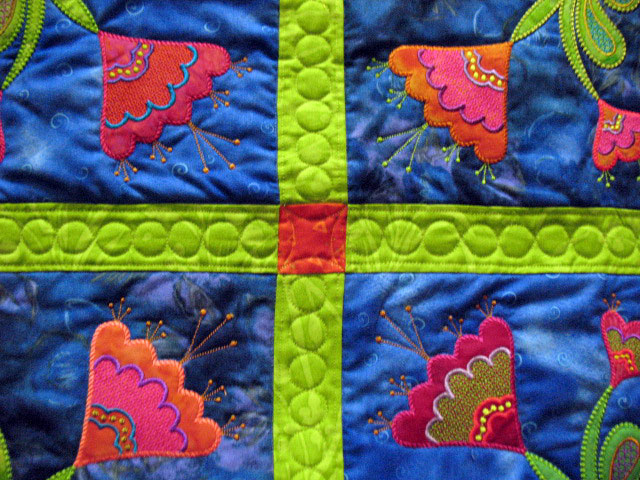
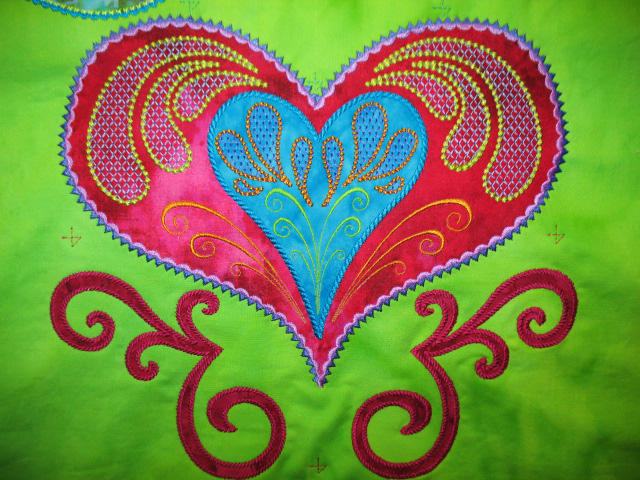
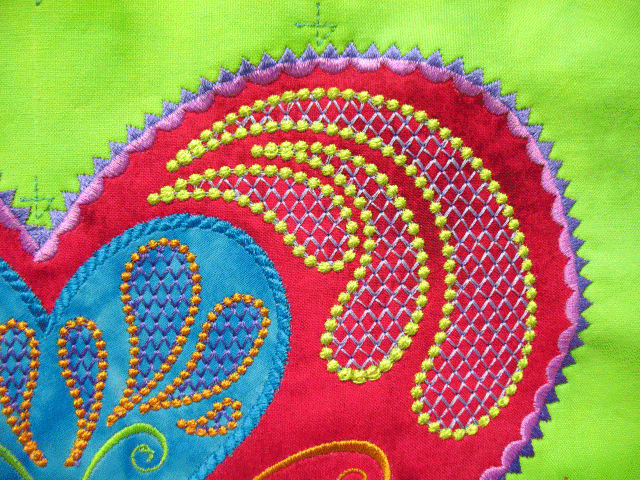
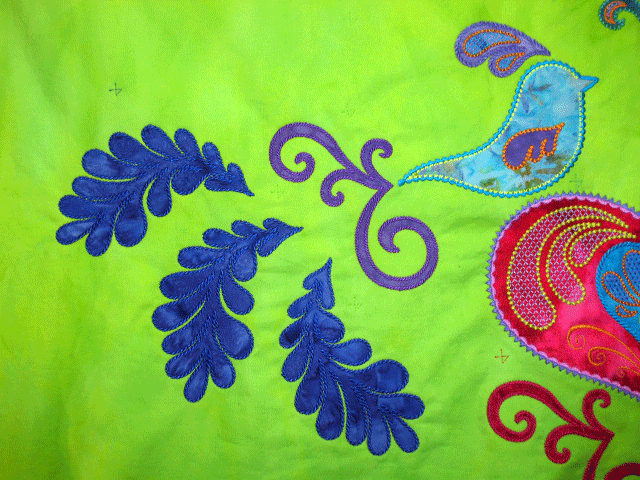
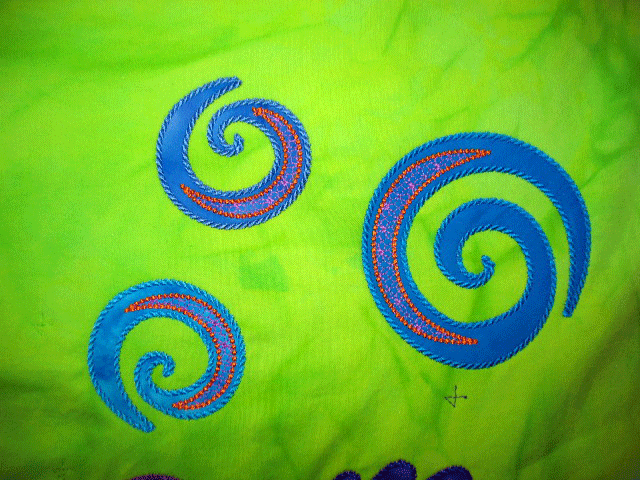
Have you tried Magnifico Thread yet?  This is a thread line by Superior Threads that debuted several months ago.  I have been using it for machine quilting and also for machine embroidery applique and I LOVE this thread!  I didn’t want to say anything on my blog until I’d spent a number of months with it and I can now say, without any reservation, that Magifico Thread is Magnificent Thread!  It has a great sheen and it is strong, strong, STRONG!  It even holds up on high speed embroidery machines, so you know this is good stuff!  I used a lot of it on this machine embroidery applique panel that measures 41 inches x 24 inches and has over 250,000 stitches on it:

giant-BB-first-attempt

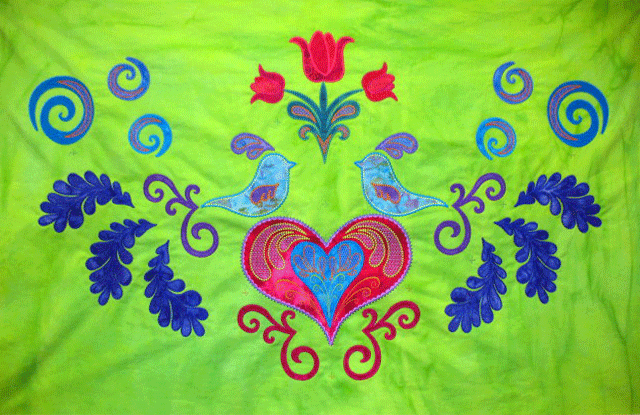
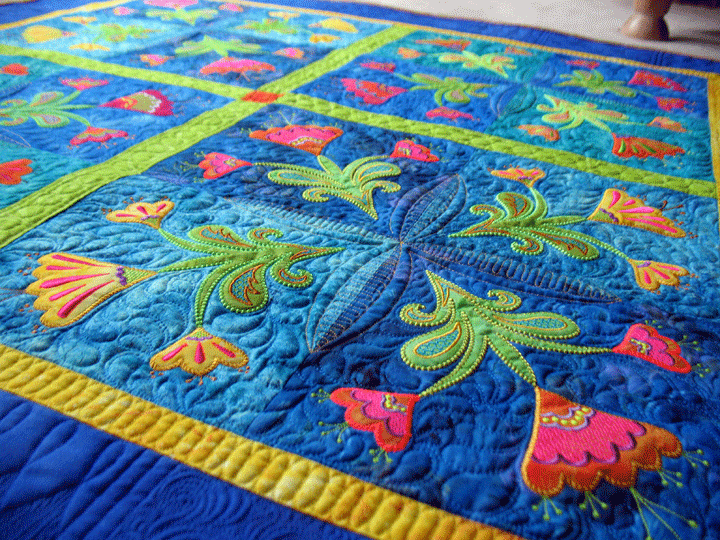
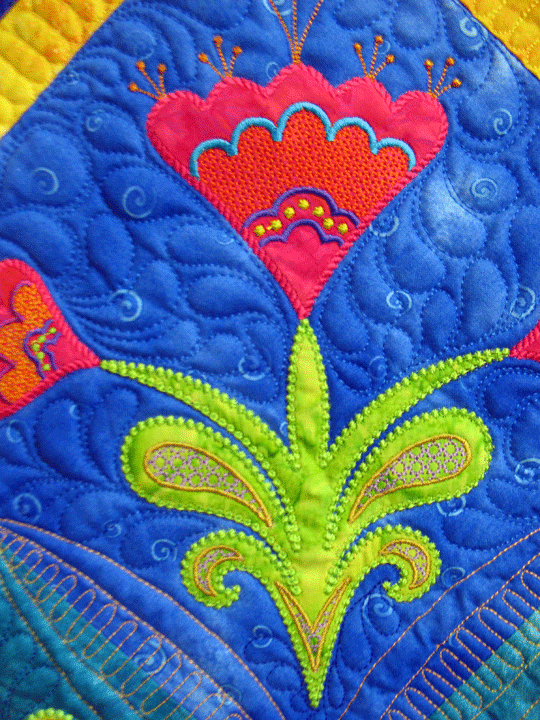
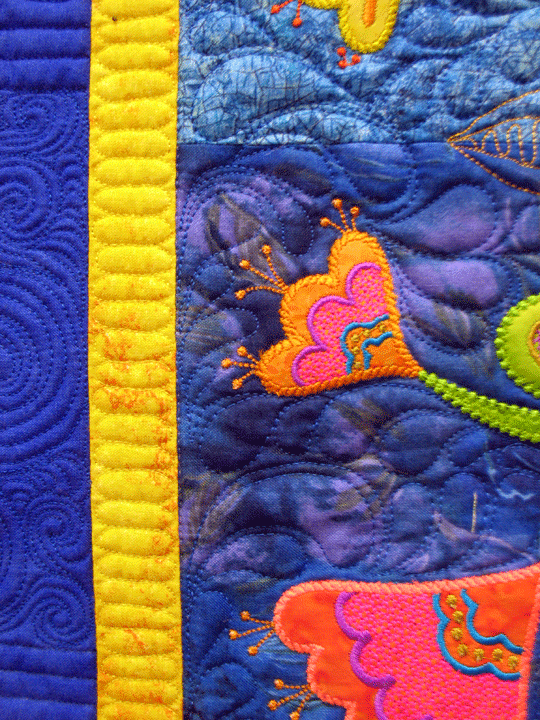
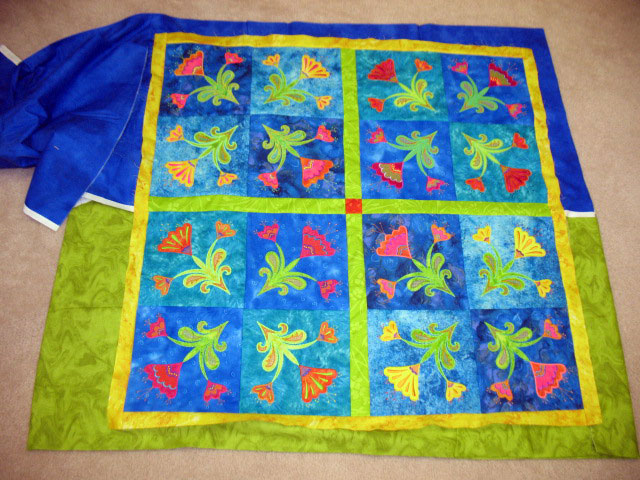
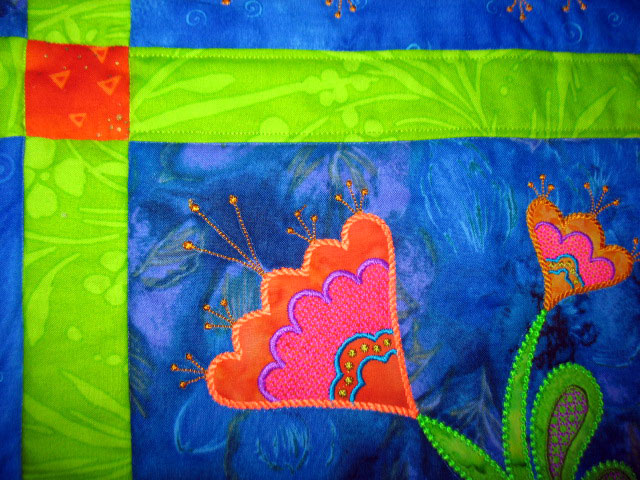
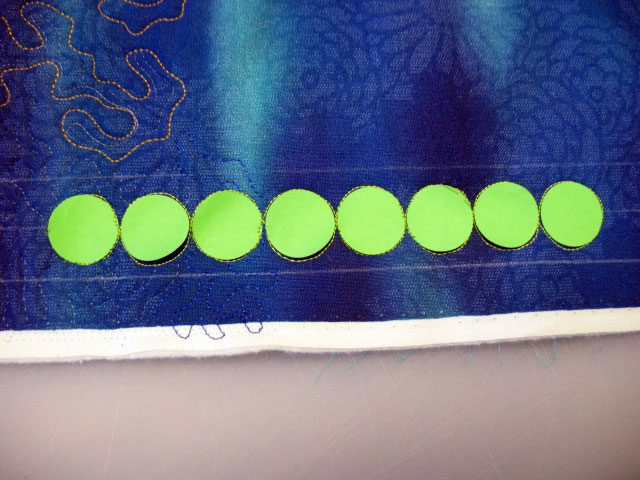
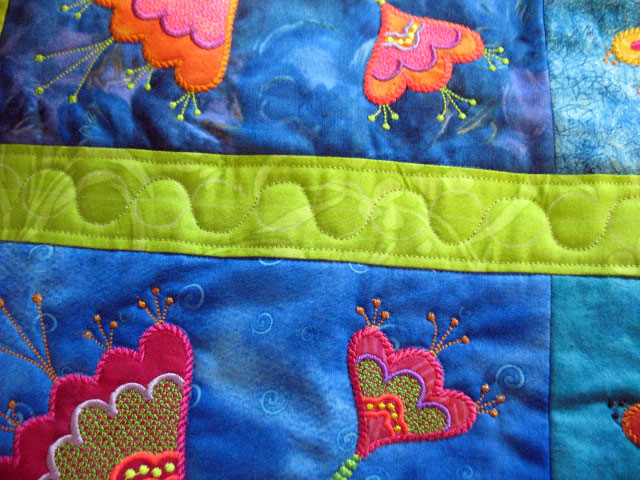
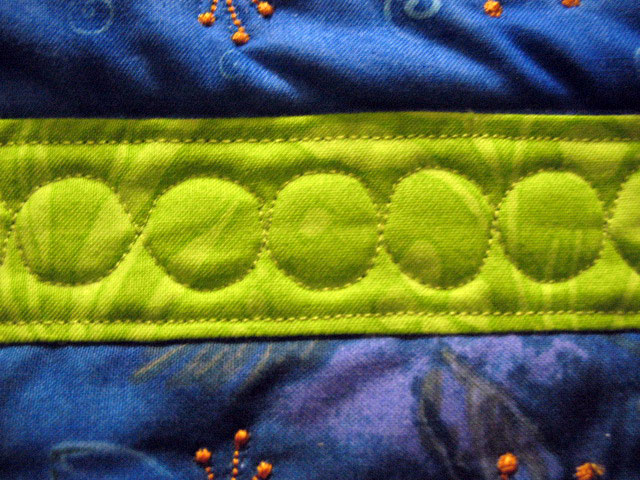
I still haven’t removed all my registration crosshairs, so it’s not quite ready to be used in a  quilt yet, but here are some closeup shots:


heart base


bbb-heart-center-closeup


bbb-heart-side-closeup


bbb-bird-tail-closeup


bbb-swirls-closeup

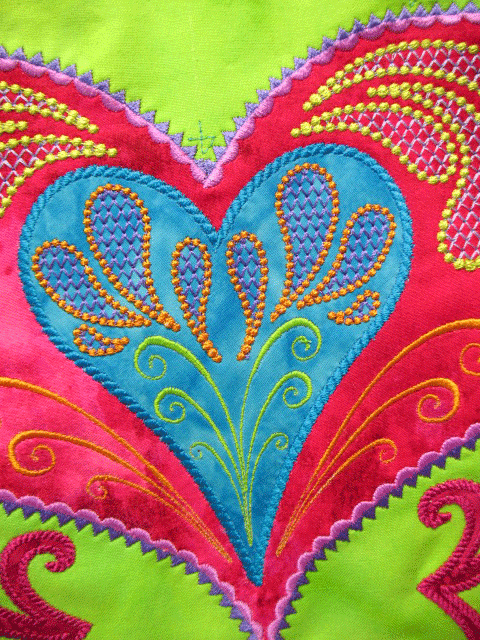
This panel is a great example of how much thread work can add to a quilt!  I’m hoping to finish the piecing of a wall hanging that uses this panel in the next couple of days and then I can quilt it…I can’t wait!!


On a more somber note, if you have had the wonderful luck to take a class with Libby Lehman or learned something by watching one of her videos or read her book, she is critically ill.  She had surgery for a brain aneurysm and then had a stroke in the postop period.  She is sedated (this helps give the brain a  rest while it is healing) and is holding her own but remains very ill.  Please find it in your hearts to send her a card or a quilted card or some show of support.  Her husband has asked that letters can be sent to:

Libby Lehman
617 Caroline
Houston, TX 77002

Thread lovers unite, and keep Libby and her family in your thoughts and prayers.

buying viagra online uk

I am a Quilter, I am a Quilter, I am …

April 23rd, 2013
…a Quilter.  I’ve been repeating this phrase for the last few days after I spent a frustrating weekend trying to make a simple pillow and had to put in a  zipper.  I do this (put in a zipper) about once every 5 years so it’s a task that feels pretty new every time I do it, and it always takes me much longer than it should.  These are the moments where I have to bolster my confidence by telling myself that I know how to make quilts, and most of the time, that is enough!


It all started very innocently.  I have a new class to teach people the basics of MEA using die-cut shapes and using a technique where you never hoop the fabric but instead “float” the fabric on top of the stabilizer.  Besides avoiding the hassle of hooping the fabric and getting it centered, this technique is kind of cool because you can take a file and do multiple different designs with it, depending on how you place the fabric on top of the stabilizer.  As an example, you can start out with a simple heart and make something basic like a pincushion:
 
heart-pincushion
Learning how to make this single appliqued heart really gives you the basic skills you need.  Once you learn the basics of how to do that (it’s very easy), the you can create other designs like this mug rug:
 
heart-mug-rug
The mug rug is fine, but I wanted to have another option for something a person could make from that trio of hearts, so I came up with this pillow:
heart-pillow-R
After the hours I spent putting in the zipper, I forgot to partially open the zipper once I finally sewed the front and back of the pillow together, so I had no way to “get inside” of the “pillow-cased pillow” to turn it inside out!  I tried to gently force it to open but it wouldn’t so I ended up having to rip out one of the side seams and open it that way!
The quilting on the pillow was fun but you can’t really see it in the photos.  Here are shots from the backside of the pillow front as the quilting was going in:
 pillow-1
 
and then the final version:
pillow-2
This was the first time I hadn’t carried a quilting design through the 4 corners and I actually like how this came out.  I thought it would look kind of “fractured” but I guess I like that fractured look!

buy viagra australia

Floral Quartet Quilt Finished

April 18th, 2013

floral-quartet-whole-quilt

I finished this quilt about a  month ago and never posted about it.  It has a lot of texture to it, which I love.  Here’s a shot of it lying on the floor near a window.  The color is not right, but it shows the texture pretty well:


floral-quartet-floor

Here are some other shots that are closeups of different areas.  The deep blue is more a reflection of the true color, but I had to take some shots without a flash to show the wonderful texture:


floral-quartet-flower-closeup

floral-quartet-sashing-cu

floral-quartet-narrow-border-cu

I love how the outer blue border came out.  I need to do more stuff like this down the road:


floral-quartet-outer-border

floral-quartet-floor-blue-border

floral-quartet-floor-block-closeup

I felt kind of dumb at the end because I had been really careful to mark a border line about 1/2 inch from all edges to be sure I didn’t quilt into the area that would ultimately become the binding.  Once I went to bind it, I felt like it needed a little punch of color right at the edge, so I added that narrow orange channel along each edge.  Of course, this covered the edge of the quilted design…GRRRRR!!!!:


floral-quartet-cornerstone-blocks

The appliques were all cut on my small Sizzix Big Shot using the Appli-K-Kutz Stems 2 die and Petals 4 Large die.  Totally, totally fun to make!

What I'm Quilting Now

February 18th, 2013

Boy, I’m really struck by how stuck I’ve been on blues/greens for awhile now…I need to focus on warm colors for my next quilt!  Here’s the center section of a quilt I’ve just begun quilting (it’s not completely pieced yet in this photo):


lge-4-patch-1

The 4 large blocks are 4-patches like this one:


lge-4-patch-2

…and all of the flowers are either red/pinks, oranges, or yellows. The shapes were all cut from Appli-K-Kutz dies and cut on my Sizzix Big Shot machine, and then I embroidered them using an embroidery machine.  Once the center section was done, I added a yellowy-gold border around the whole thing:


lge-4-patch3

I couldn’t decide what color to use in my outer border, so I started auditioning fabrics by laying them “next door” on the floor:


lge-4-patch5

I ended up going with the blue border and using small machine embroidered blocks for the 4 cornerstone blocks, but I didn’t snap a photo once it was at that stage.  (There will be more photos of this quilt to come as I get to quilting all the different parts.)  Once it was basted into a sandwich, I outlined all the applique shapes with Monopoly invisible thread and also did all the stitch in the ditch along the outside of the large 4-patch blocks and along the sashing/borders.  (I deliberately didn’t stitch in the ditch inside the 4-patch blocks because I want to use a quilting design in the centers that would be “fractured” if I did stitch in the ditch there.)  I started quilting the light green sashing by quilting 2 parallel lines about 1/8 inch from the stitch in the ditch lines.  This photo shows how it’s already making the sashing look a bit different:

lge-4-patch-6

My goal was to then stitch a chain of very large circles inside the sashings.  When you’re stitching really big circles in a  setting like this, it’s important that they look fairly symmetric and there’s no way I could do that freehand.  I had seen a posting on the Quilt Rat’s Blog some time ago about placing adhesive circles where you wanted to quilt and then stitching just outside the edge.  I’d never done it before, so I did a short run of them on a throw away sandwich:


lge-4-patch-7

It worked great, so I marked a line down the center of my sashing and placed my long line of adhesive circles.  I was excited as I got ready to start stitching, but then I realized that most of my circles had come off/changed position just by me manipulating the quilt.  DRAT!!!!!!  That told me this technique is probably good in places where you only have a few circles and won’t need to manipulate the quilt much, but it wouldn’t work for what I needed.  I removed them all and then started marking with one of my trusty templates from the office supply store:


lge-4-patch-11

Once marked, I stitched the first half of the circles out like this:


lge-4-patch-9

…and then went back along the opposite sides to finish the chain of circles.  Here’s a closeup of what the sashing stitching look like:


lge-4-patch-10_01

And here’s a shot that shows part of all 4 sides of the sashing:


lge-4-patch-10_1

I really like how that sashing came out with an interesting texture and can’t wait to quilt the rest of it!

cost viagra

Making the Holidays a Little Bit Greener

December 25th, 2012

Many years ago, I threw together a couple of large Santa bags because I couldn’t figure out how to wrap 2 large, unusually shaped presents.  Over the years, I’ve made several others in a  variety of sizes, and my husband and I kind of got to the point of fighting over them because it’s a quick way to get a gift wrapped and under the tree.  The last 2 Christmases, though, I’ve really been on a mission about it.  I’d gotten to the point of really being bothered by all the paper waste around the holidays, so we decided that we’d go totally green with our gift wrapping.  This year, the goal was to only wrap in Santa bags or recycled decorated bags, and we made it!  The key is waiting until the after Christmas sales when Christmas fabrics are 75% off or better.  Stock up on a  large variety of fabric prints and also buy up lots of decorative roping/cording to run though the casing at the top of each bag.  Most of our bags are just Christmas prints with cording at the top, but this year, I had a bit more time and decided to make a few nicer ones with Christmas appliques on them.  For example, this was the center portion of one bag and these are die cut snowflakes using a Sizzix die:

(For applique shapes this delicate, I just stitch around the inside perimeter with Invisifil thread by Wonderfil.  Because it’s so lightweight, it won’t really draw attention to itself but it will hold down the edges of that applique very well.)  Here’s another one that was cut from the Appli-K-Kutz 8 1/2 inch diameter feathered wreath and the wreath is finished with the candlewicking stitch:

I added some red borders to give it a little bit of a patchwork look:

…and then I added another green fabric at the top to hold the casing.  Here it is with a recycled gift box inside it, holding something special for Ernie:

Here’s hoping that all of you have a wonderful Christmas with your families!

kamagra gel cheap