Two Week Sale, Great New Rulers and Reads! Newsletter

September 27th, 2013

We are having a SALE!!!  Beginning immediately and running until Friday, October 11 , 2013 at 9 AM (EST), all retail sales of King Tut and Lave Cones, Living Color and Razzle Dazzle spools are on sale at an additional 15% off their already discounted price. This means that you can stock up on thread and with a discount of  35% off the manufacturer’s suggested retail price!   On top of that, ALL Books not published by Patsy Thompson Designs will also be on sale!  These will also be discounted an additional 15% off their already discounted price. That’s 35% off MSRP! The Holidays will be here before you know it, so stock up on these threads and books for all of your Holiday projects! Enter the discount code: Two Weeks at checkout to get the discount!

What’s new this week at the warehouse?  Check out some of our wonderful new rulers and other great quilting notions below!

Remember that each and every retail purchase that you make in our store is being tabulated to count toward a gift certificate you may use for a future purchase.  This is our way of thanking you for being a loyal customer.  Please make sure you are logged into your account when making a purchase to properly track your points.

**Please note that when purchasing any item in this newsletter , your order will not ship until Tuesday October 1, 2013, as these are new items in our store.**

Do you want to try out the Sizzix Big Shot machine, but aren’t quite ready to invest in one? Come rent some time on one of ours in the warehouse! Follow this link: Big shot rental


Famore Seam Ripper 5 1/2in with 3 Blades


These seam rippers are made of high grade steel & are thru hardened. They have a power-lock screw design; razor sharp edges; and superior rust & corrosion resistance. They will give you an easy, clean & precise cut every time.
 
MSRP $9.29… our everyday low price only $7.43
 
Grip & Rip Combo Set Comfort Gel Seam Ripper and Thimble


Grip n Rip set comes with a Comfort gel seam ripper and thimble.
 
MSRP $5.99… our everyday low price only $4.79
 
Cut Rite Heavy Duty Freezer Paper 25pk


This is the thickest and the sturdiest freezer paper available. Extra thick sheets won’t curl and are reusable. Specially formulated coating for temporary adhering to fabric. Use with ink jet printer to print patterns, shapes and templates. Use as stencils, prevents bleeding.
MSRP $9.95… our everyday low price only $7.96
 
Sew Merry and Bright


Have yourself a colorful little Christmas! From popular designer Linda Lum DeBono, this handmade-holiday collection offers an exciting array of decorating ideas.

  • Fill your sleigh with 21 fun and whimsical projects, including wall hangings, place mats, ornaments, stockings, table runners, a tree skirt, an Advent calendar, and more
  • Indulge in bright novelty prints; projects also work nicely in a more traditional palette
  • Find a host of cheery home-decor items and gift ideas for Christmas
 
MSRP $24.99…  on sale for ONLY $17.59
 
Holiday Cheer Quilts


Celebrate the season with your choice of nine festive quilts in a wide variety of styles. Projects range from a bold “Holiday Cheer” table runner to a dazzling “Christmas Star Wreath.” And don’t miss the fast and fun “Little Forest” quilt, where the trees grow quickly. Learn easy techniques and get creative with fanciful fabrics.


MSRP $12.99…  on sale for ONLY $9.14

I love this particular brand of medicines! Buy cialis online! The difference between a brand name medication and a generic is in the name, shape and price.

Escape Artist Bag & Clutch


Designed with the options for panels (needlework or fabric). 15in W x 18in H x 7in D

From Anna Maria Sewing Patterns

Designed by Anna Maria Horner

MSRP $12.95… our everyday low price only $10.36

Boardwalk


This strip-friendly design uses neutral blocks of varying sizes to stagger the strips, reminding us of the planks on a boardwalk. You can make this quilt using pre-cut strip packs or fashion fabrics that you select. The pattern includes instructions for two arrangements of the colored strips, and two finished sizes of quilt.

From Amelie Scott Designs

Designed by Amelie Scott

 
 MSRP $9.00… our everyday low price only $7.20
20th Anniversary Quilts Without Corners Platinum Edition

This book has refreshing new samples, re-worked techniques and re-colored graphics.  Many new design variations, two new patterns, templates for framing the circle quilts, the 10 degree wedge extension and the mini 10 degree template are included with this book. All templates are paper.

MSRP $22.98… on sale for ONLY $16.17
 
Check out these four wonderful corresponding rulers to go with the 20th Anniversary book! They can be used with this book and so much more!
10 Degree Mini Wedge Ruler


The ten degree wedge is used to make the quilts in the book Quilts Without Corners. The tool includes reproducible circular graph paper and a complimentary tree skirt pattern.

MSRP $10.98… our everyday low price only $8.78
 
10 Degree Squared Extension Ruler


Extend the 10 degree wedge to make your designs a 70in square. The tool is marked to make squaring simple.

MSRP $12.48… our everyday low price only $9.98

10 Degree Wedge Extension


Extend the 10 degree wedge to make your circles 70in in diameter.

MSRP $12.48… our everyday low price only $9.98

10 degree Wedge Ruler 24in Long

The ten degree wedge is used to make the quilts in the book Quilts Without Corners. Thirty six wedge pieces make circles up to 50in in diameter. The tool includes reproducible circular graph paper and a complimentary tree skirt pattern.

MSRP $19.98… our everyday low price only $15.98

Creative Grids Hexagon Trim Tool 2in 4in 6in 8in With 21 Holes


Create perfect pieced hexagons with 2in, 4in or 6in finished centers by squaring up each round of strips as you go. Since each round is squared up before the next set is added, the blocks created are perfect hexagons. Or use the markings to cut 2in to 8 in finished hexagons & every size in between.

Only $24.95
 
Click on each of the images below to be directed to the corresponding Sale Categories! For an additional 15% off our everyday low prices of 20% for a grand total of
35% off MSRP savings!
 
All NON-PTD Books are on sale! Please check out all of our: Books by Other Authors!


King Tut Cones   


King Tut is an extremely low lint #40/3 extra-long staple Egyptian-grown cotton. Variegated colors are precision-dyed with one-inch color changes.   King Tut is a wonderful choice for Machine Quilting.  The low lint allows for more time quilting and less time cleaning your machine. 

  • Ideal for quilting and decorative stitching.
  • Nature’s finest thread.  
 
 MSRP $24.95... on sale for ONLY $17.56
 
Lava Cones


LAVA is a #35 polyester thread precision-dyed with 1-inch color change intervals.

  • LAVA is wonderful for quilting, embroidery, and decorative appliqué.
  • LAVA is is precision-dyed so there will be not be random selections of color but a uniform color change pattern.

 MSRP $21.95… on sale for ONLY $15.45

Living Colors


Living Colors by Hollis Chatelain is a 40 wt. high-sheen premium trilobal polyester thread. Beautiful color presence when embroidered or quilted.

  • Excellent skin tones for thread painting portraits.
  • Ideal for embroidery and quilting.
  • Sheen is similar to rayon but Living Colors are stronger and colorfast.

 MSRP $5.99… on sale for ONLY $4.22


Razzle Dazzle


Razzling dazzling 8 wt. polyester thread for bobbin work, couching, reverse quilting, and serger.  Beautiful sparkle makes Razzle Dazzle stand out in your projects.

  • Beautiful accent thread for couching projects.
  • Polyester thread intertwined with metallic.
  • Razzle Dazzle is made from polyester with metallic and is iron safe up to 450 F degrees. Most irons up to the medium heat setting are within that range.
 
MSRP $6.99… on sale for ONLY $4.92
 
All NON-PTD Books are also on sale! Please check out all of our: Books by Other Authors

Some Absolutely Stunning Quilting

September 16th, 2013

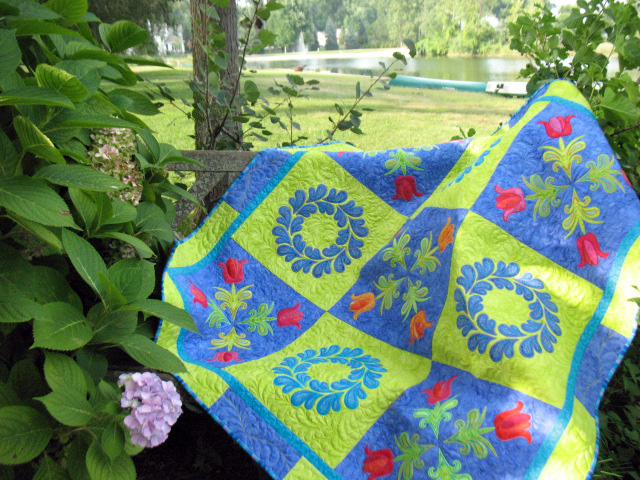
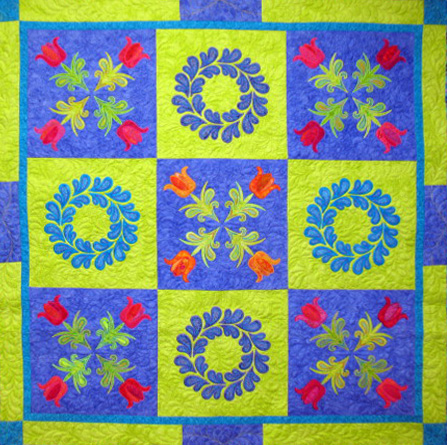
Tick Tack tulip Quilt

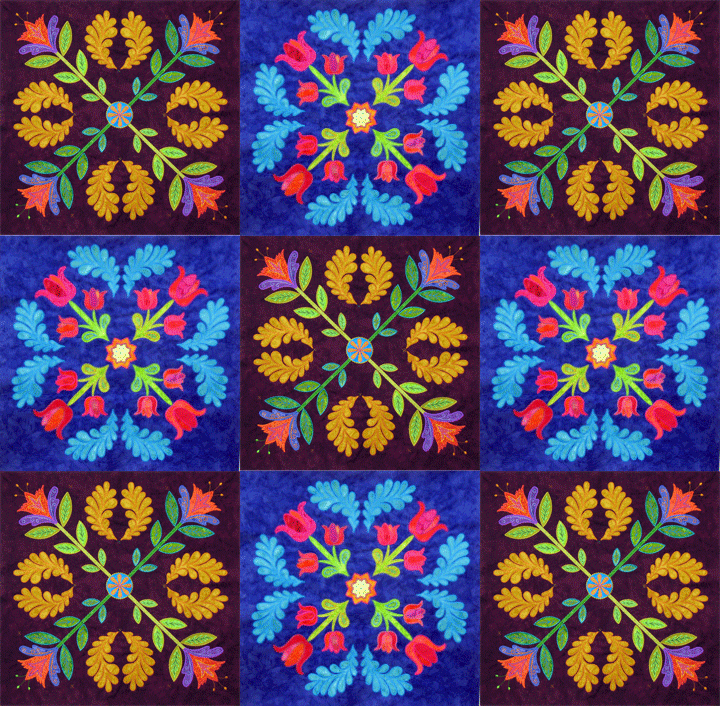
Do you remember this quilt?  I call it the Tick Tack Tulip Quit because it’s kind of in a Tick Tack Toe-like layout.  It’s easier to see in this photo:


TTT quilt photo for instructions

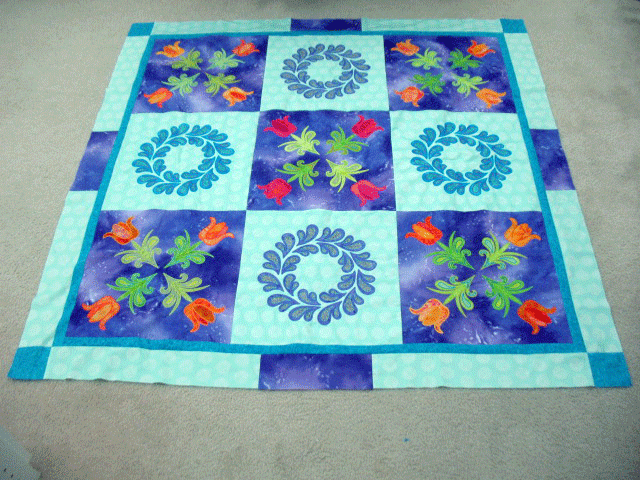
Anyway, this quilt was the first version of this pattern and I quilted it myself.  I’m trying to make multiple samples of different patterns so I can loan them to quilt shops but there’s no way that I can quilt all of them.  (In fact, I can’t even do all the embroidery of multiple copies of each pattern.)  I enlisted the help of a wonderful embroiderer named Linda Hill, (I would link to her blog but she doesn’t have one), and together, we embroidered the blocks for this version of the Tick Tack Toe Quilt:


TTT-version-2

I don’t know how I got so lucky, but professional long arm quilter Margaret Soloman Gunn agreed to quilt it for me.  You may be wondering why I would send a quilt out if I love to free motion quilt myself and I’ll give you 2 very good reasons:

1.  I just don’t have time to quilt each and every one of my quilts right now.  I’m still quilting nearly all of them, but I can’t keep up, especially now that I’m making multiples of many quilts; and

2.  No matter how much I love to quilt, I have loads and loads and loads to learn about machine quilting.  Truthfully, there are times that I find my quilting somewhat boring and I want to learn new skills.  I have seen some of the most beautiful and most interesting quilting of my life in the past year and I find myself very drawn to machine quilting where the quilting itself divides the original surface design into a new secondary design.  Right now, I do not possess the “vision” to do this well but I sure as heck want to learn how to do it.  What better way than to learn from quilters who have mastered this?

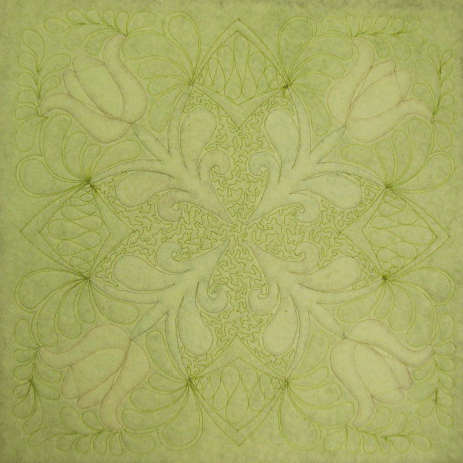
So, with that introduction, let me refer you to a blog post that has me VERY excited!  Margaret has posted some photos of how she transformed the Tick Tack Tulip Quilt shown above into a masterpiece, all by virtue of her expert quilting. If you look closely at her photos, you will see some wonderful examples of creating a new secondary design with her quilting.  I can’t wait to see this baby in person because I will spend many hours scrutinizing it  and hoping to learn just a smidgeon of this skill.  Ironically, I have one other quilt that’s out to be quilted by another quilter extraordinaire, and I’ll post about that quilt and that long armer later on!  For now, feast your eyes on Margaret’s blog and please scroll backward to look at her work…fabuloso! (Here’s a link to one of my favorites posts!)  And if you’d like to learn how to make the Tick Tack Tulip Quilt and have this quilt hanging in your shop, ask your local quilt shop owner to give me a call!

Everyone should use this product. If the gut isn’t working right than all the other products you take will not be able to do there job! Cheap levitra online us. The difference between a brand name medicine and a generic one is in the name, shape and in the price.

Designing Quilt Blocks and Designing Quilts

September 8th, 2013


thistle-block-single

The more quilters I meet, the more I realize that we all “see” things differently.  I have been quilting for more than 35 years now, and I have designed my quilts using an “as-you-go” design method from the start.  This has always what been what seemed to come naturally to me, and I was really surprised the first time a friend showed me a piece of graph paper where she had drawn out and colored all the pieces of a quilt she was designing.   I immediately thought “I could never work like that,” yet as I think about it, her method really fits better with the way I do pretty much everything else in my life.   I pre-plan  and outline everything, so I’m not really sure where this spontaneous method of designing comes from.  But, it works for me and is still fun for me, so I thought I’d share how I come up with designs.  This next quilt block is a very good example of my basic approach:

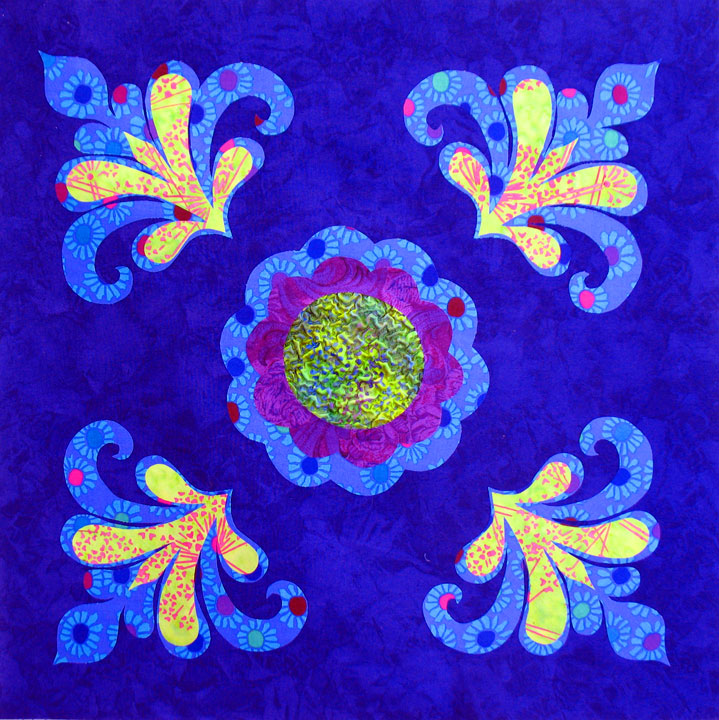
blue-block

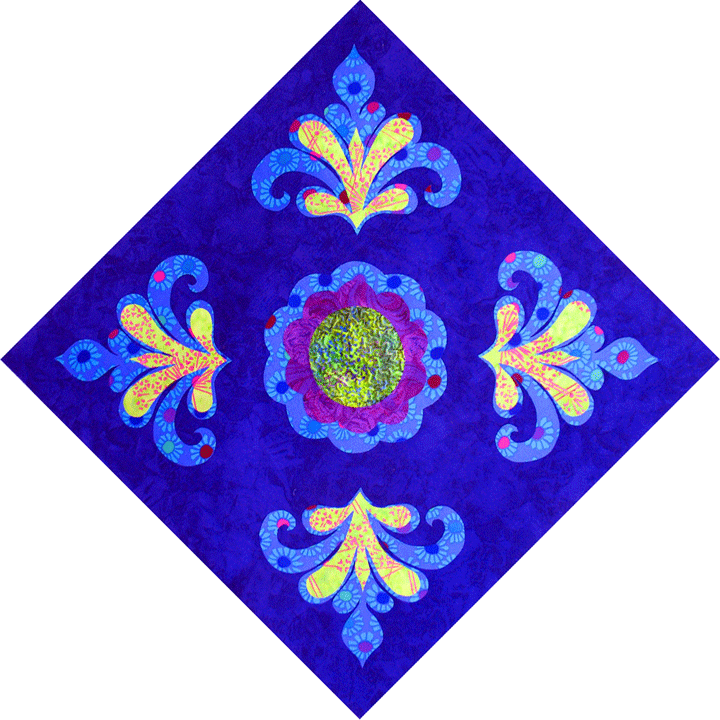
I began by cutting a block in the size I wanted, then drew a light soap line from each corner to the opposite corner, creating a large “X” across the block.  This divides the block into 4 equal quadrants and creates the groundwork to create a design that is set on point inside a block that is set on square.  Again, this gets back to how you visualize things.  I could set this whole block on point, and now the design inside it would appear different as in the image below:


blue-block-on-point

But, for the sake of making this easier to understand, let’s go back to that first orientation:


blue-block

Once I have those quadrants outlined, I have an idea of how large a space I want to fill.  Since the point of intersection is the center of the block, anything I place there will be in the dead center.  In this case, I wanted to place that large daisy in the center.  My mom gave me a brightly painted wooden mirror in that shape when I was about 13 years old, and whenever I have gone back to visit her, I have seen that brightly colored mirror.  My mom moved a few years ago and we needed to clean out her house, so I took that mirror home and traced its shape to get my center flower and the smaller flower inside it.  The only thing I did to alter it was to texturize some fabric with Texture Magic and I used that to fill the center-most section.   If you’ve never used Texture Magic, here is a link to a video we made about how to use it.


So, back to designing this block…I plopped my center flower in that center position and this left “blank space” in the 4 diagonals that spring from the center.  I took a ruler to measure the length of a quadrant, then I folded a piece of paper in half and placed 2 pencil marks on it that gave me a rough idea of a starting base point for my design and my upper ending point, or “tip” of my design.  (I deliberately made the length of these marks less than the measured length of a quadrant since I didn’t want to overcrowd the block.)  I drew one side of the light blue shapes above in pencil, then I cut them out along the folded side to ensure I had  a design with symmetry.  I placed my paper version in one corner to make sure it would fit, then used my paper template to trace around onto Wonder Under fusible web and then fused/cut my fabric applique pieces.  I did that same thing for the smaller yellow shapes that you see inside the light blue shapes.


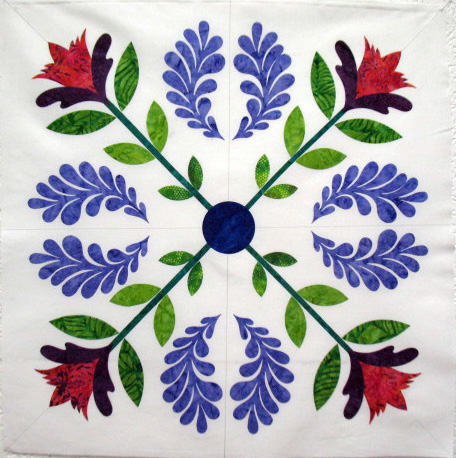
For years, I made my quilt blocks in this way, then finished to edges with some type of decorative stitching. In the last 2 years, though, I’ve been almost exclusively making machine embroidery applique blocks.  I’ve had to switch some of my work habits for these, and the process takes much longer because there is a lot of “tweaking” that happens along the way.  This next example is  of a block whose designing began about 4 1/2 months ago and it is still not completely done.  I first created a “mock up” of the block but I used muslin  for the background since this mock up will never be finished:
22 in block2

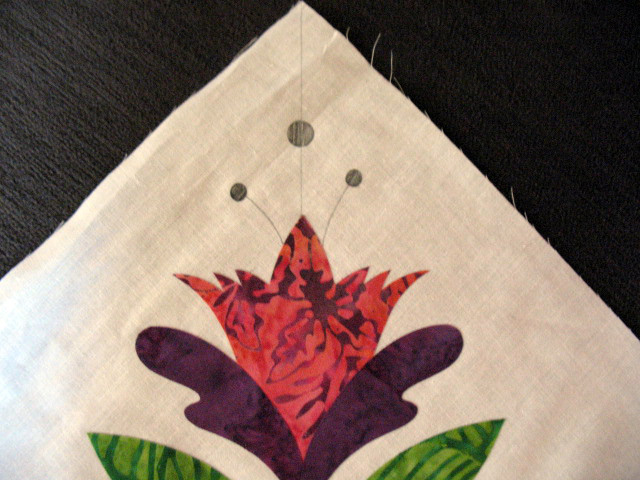
If you look closely, you will see that this block has been divided into 8 quadrants, as there are pencil  lines from each corner to the opposite corner as well as from the midpoint of each side to the opposite side. This is a very large, 23 1/2 inch square block.  What you see above are the various applique shapes that collectively form this block, but there are other decorative issues when it comes to designed a MEA block.  For example, each corner will have some stitched lines to denote the stamen of each flower and you can see that in the close up photo below:

thistle closeup


I am mainly working with shapes cut from Appli-K-Kutz dies that were cut on my Sizzix Big Shot machine, so that makes this part of creating a “mock up block” fairly easy.  BUT… this is only the beginning!


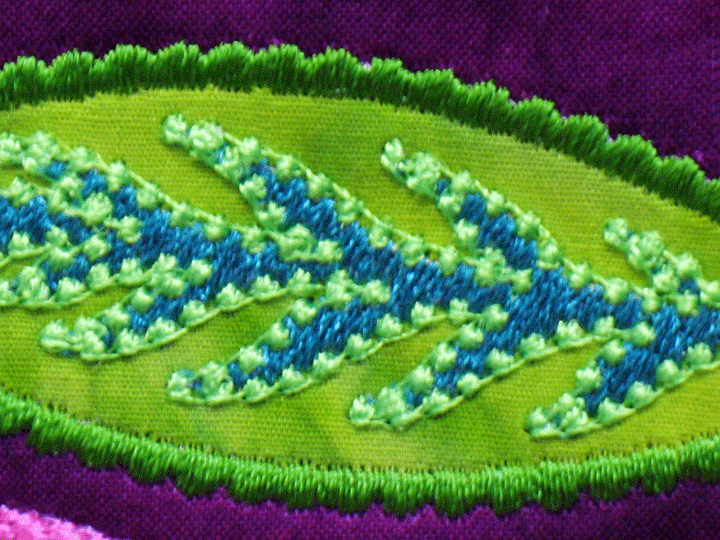
On top of all this, some of the applique shapes will have designs inside them, (all created with thread), like the leaves, all parts of the flowers, and the center circle, so it takes me awhile to determine what those “internal” designs will be.  Once I’ve figured out the “internal designs” and chosen all the decorative stitching that will be applied in all the different spots around and inside the  applique shapes, I send all that info and my mockup block photo to a digitizer.  I can do basic digitizing, but nothing close to designs this complex, so I’m really grateful to be working with a wonderful digitizer.  Once the block has been digitized, I do many stitch-outs and this is where the tweaking begins.  Sometimes, it is little things, like learning that a decorative stitch needs to be shortened  a little so it looks more appealing, as you can see in the photo below:

thistle-leaf-closeup

Other times, it is a major overhaul.  Can you spot the problem in the block photo below?


thistle block 2


This one’s harder to spot, but if you look closely, you’ll see that the pair of feathers in the 3:00 position is so close together they are nearly touching.  This is because the way we had the registration marks configured, if a person made  a small error in alignment on an early hooping, it would be magnified as more hoopings occurred.  It’s tough to see, but if you look closely, you’ll see that some of the flowers aren’t exactly aligned along the corner diagonals and this is all part of the same error.  This is a big deal problem to correct, especially when you consider that this block is so large it takes a good 2 1/2 days of very focused work to stitch out!  So, it’s back to the drawing board and a whole new series of stitch-outs!  But, in the meantime, I can play with a “raw block” and get myself excited about possibilities.  A few of these are shown below, the first one being a simple 4 patch quilt which would finish at 46 1/2 inches if nothing further were added to it:


thistle-4-patch

(Every time I see this image, I think to myself that this would be a beautiful postage stamp!  Of course, you could make this as a 9-patch, 12-patch, etc.  Here’s another example of an interesting quilt created when  this block is paired with another large block I made a couple years ago:


thistle-tulip-9-patch


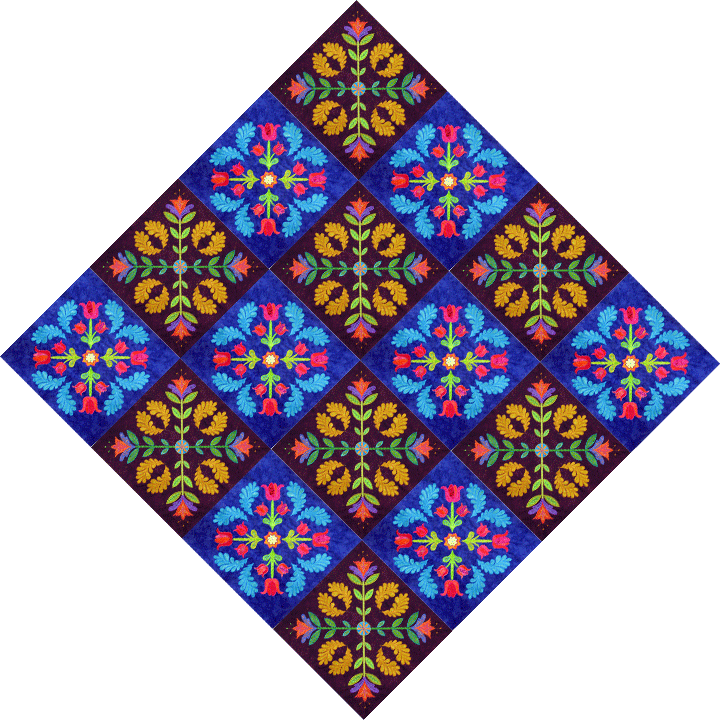
…and here’s the same quilt with the blocks set on point:

thistle-tulip-on-point

It has become so easy to “play” with images that it’s a wonder we do anything else anymore.  Until my next post, happy quilting!


My husband used to start everyday with the product and it really works. Buy 25mg viagra? Our goal is to provide medications at discount rates to everyone who is affected by expensive local prices.

Playing with Rulers on a HDSM

September 2nd, 2013

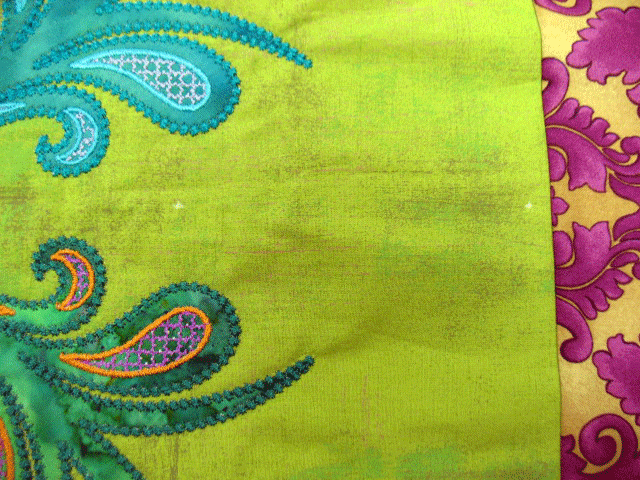
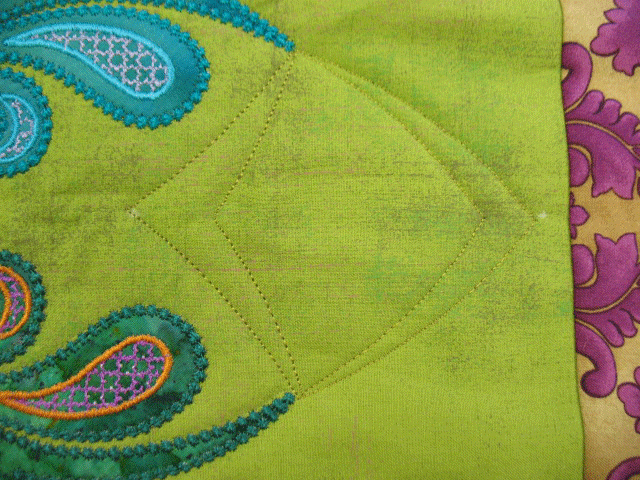
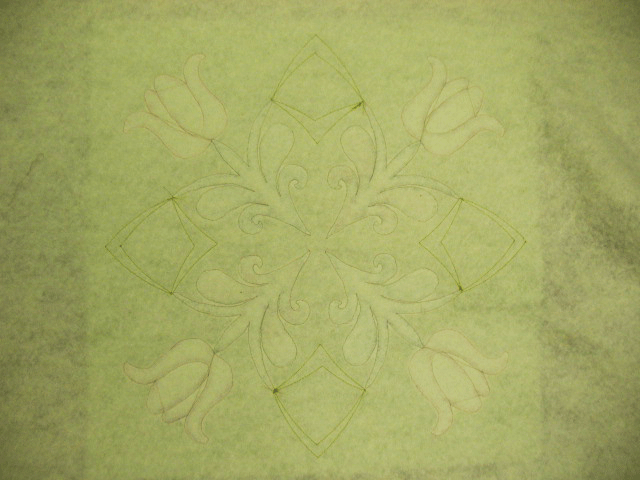
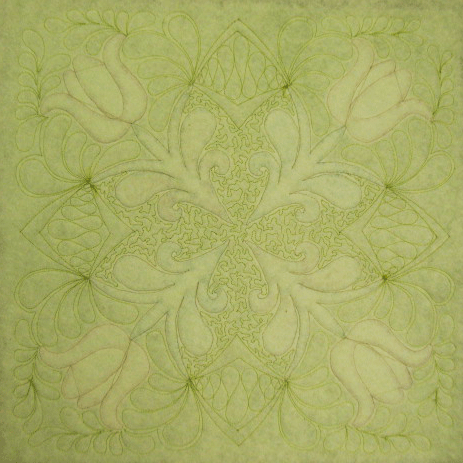
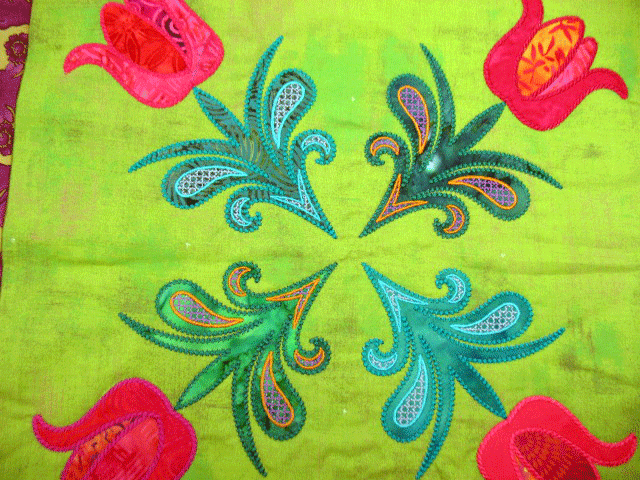
Sadly, this is one time that showing you a picture of the front of this tote won’t tantalize you because although it looks really nice in person, the quilting doesn’t show up well enough in the photo to even really see it.  You can kind of get a feel for it from the backside, though:


TT-backside-whole-thing

This all started because I wanted an opportunity to play around  with an acrylic ruler on my HDSM.  This is the center section of a tote bag I’m making, and I wanted to use a ruler to create a secondary design:


TT1

Part of the thrill of working w/rulers is no marking or next-to-no marking.  I started with only these 2 tiny white marks on each side as my guide:


TT2-marking


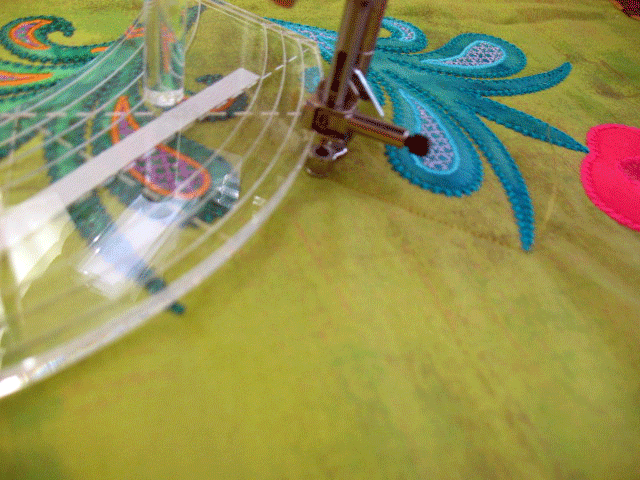
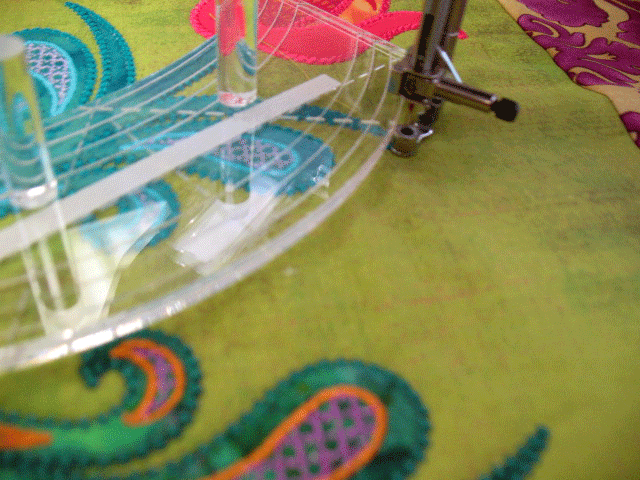
Between those white dots and the points on the stem shapes, my goal was to create a secondary design.  To start, I laid my ruler so that it would give me a curved line that would start and end at roughly those places.  This is where the learning curve comes in…you can really only develop a sense of the correct allowance by practicing (just like when you first learned how to FMQ), so you have to go into it accepting that you’re going to make some mistakes along the way.  Here’s a shot of the ruler laid out and if you look, you’ll see that there’s an allowance (i.e. “empty space”) by  the dot.  (There’s also an empty space by the stem tip but you can’t see it because of the free motion foot):


TT3

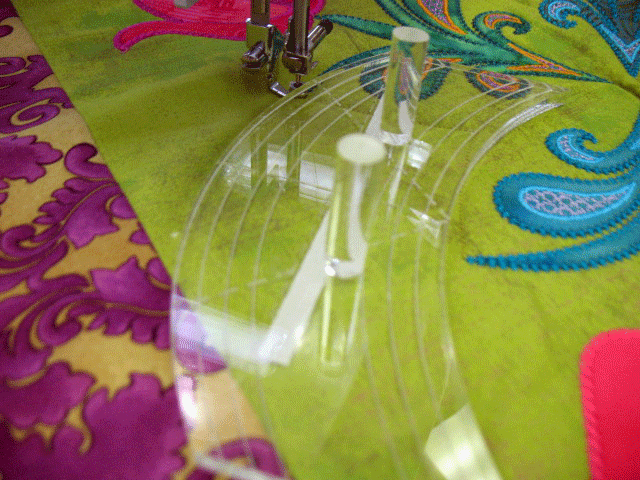
Take a close look at the free motion foot.  That is an improvised foot (aka a home-made foot) that I created by using the Babylock/Brother Free Motion Foot C and super-gluing a 1/4 inch high cylinder to the top of it.  My hope is that all these sewing machine companies will start developing feet for us HDSM users to allow us to do this ruler work, but in the meantime, we have to get inventive.  I held that ruler with my left hand as I moved the quilt with both my hands.   Deliberately running the edge of your foot along the edge of the ruler will get you  a nice, smooth, curved line.  I should also tell you that the ruler I was using here is called the 6 1/2 inch Fine Line Continuous Curve Ruler and you can read about it here. 


  Once that first curve was stitched, I moved my ruler between the next 2 points:

TT4

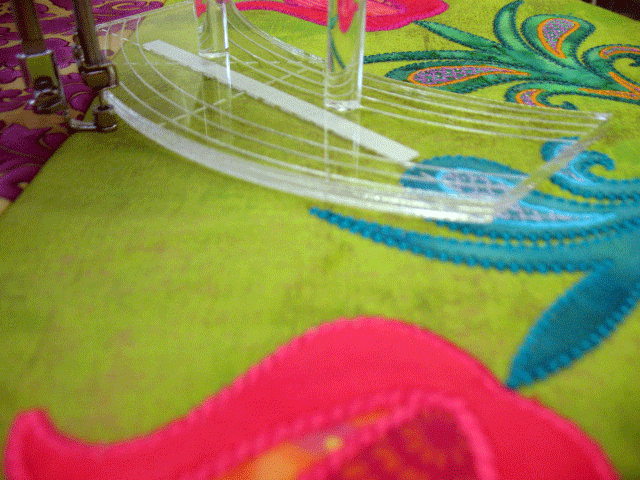
…and then I stitched that second curve.  These first 2 curves were convex curves, but for the next 2, I wanted to stitch concave curves.  Notice that the curve will be different in this next configuration:

TT5

For this curve, I held the ruler with both hands and this was surprisingly easy.  For the 4th side, it played out the same way:

TT6

That completed all 4 sides and my next move was to go back in to each shape and do the same thing on a bit smaller scale.  This allowed me to create a channel.  That channel is VERY important because without it, your quilting is pretty much lost.  Here’s what the 4 shapes looked like once they were completed:

TT7

The backside at this point looked like this:

TT8

From there, I added a plume-based fill design that sprang from each side of these curved “units,” then filled the curved units with a “Grandma’s ribbon candy” design, then filled the center section with stippling to set it off from the rest.  I used 2 different green polyester threads but they are both so close to the background fabric that you can’t tell and my thread choice is my only regret  It looks very nice in person but the photos just don’t show the quilting on the front well enough, so here’s a shot of the back:

TT-backside-whole-thing

If there is any part of you thinking about trying this, go for it!  It is loads of fun and even though it’s a bit humbling because you’ll make a lot of errors, it really allows you to create some very interesting quilting designs.  It’s harder to hold the larger rulers and for me, the 6 1/2 in curved ruler and the smallest size of the straight ruler are very easy to manage.  Good luck!
I have tried many brands of products and this is definitely the best I have used. Buy diflucan online? That is why we pay attention to the quality of the medications.
Labor Day Weeklong Sale

September 2nd, 2013

BB2

To celebrate Labor Day, we are having a sale!  All retail sales of Appli-K-Kutz dies, PTD books, PTD DVDs, and stencils are 25% off through this Friday, 9/6/13 at 9 am eastern DST.  To get the discount, enter Labor Day 2013 in the discount code box during checkout!

To keep my erection healthy this are the ticket. Canada cialis generic. We offer Canadian medications from a fully licensed Canadian mail order pharmacy.