June 30th, 2013
Sometimes you really want to showcase or highlight a quilt block and a one way to do this is to create a feathered frame surrounding the block. These always look complex and rich but they are usually pretty easy to construct if you break down the steps taken to create them. In this case, I wanted to create a feathered frame to highlight the center block in this quilt:
 (Sorry about all the wrinkles, but this quilt had been folded up in a suitcase for a few days when I took this photo!) When you’re creating something like this, you have to take some cues from the block itself. The large feathered wreath inside it has very, very heavy thread work in it, and that gives the wreath kind of a “celebratory” look. Here’s a close up of one of the feathers on the outer ring so you’ll understand what I mean:
 Whatever I do in this frame area, it needs to fit with the “feel” of the block. I’ll need my quilting to be pretty showy in accordance with that “celebratory look,” but I don’t want my quilting to compete with the embroidery. The embroidered applique needs to be “center stage.” The first thing I did was to mark temporary lines that divided the quilt into 8 equal sections. I marked a diagonal line from each corner to its opposite side and also marked a line from the center of each side to the opposite side. You can see what 1 side looks like here:
 I want to create some type of structure emanating from each corner, and I’ll later use that structure to flow feathers toward the center of each side. You can use all kinds of things for a structure like this. I’m in a big hurry, so I’m taking the easy way out by using a portion of a stencil to give me the 4 corner structures. I’m using the Feather Adante Stencil and I begin by placing 1 quadrant of this stencil in a corner, and lining it up with the diagonal line I marked in soap earlier:
 …and here it is traced with a soapstone maker:
 …and here it is stitched:
 The thread color above looks more dramatic in the photo than it really is, but it is a thread color that has reasonable contrast with the background fabric. This is what I meant when I said I needed to keep with the “celebratory” nature of the block. This just wouldn’t be a good place to have the threads match or nearly match the background fabric. Next up, I cranked up the celebratory fee big time by hyperquilting each of the corner structures. I used Robison Anton 24 karat gold rayon thread for this, and I use this particular thread for hyperquilting more than any other thread:
 Isn’t it amazing just how much that hyperquilting can add?!
The next step is to create the “bones” of the frame. Again, this is much easier than it might seem. I use a flexible curve ruler and place 1 end next to where I want to begin my feather and then I bend it into nice curves that will have my feather travel to where I want it to end. In this case, I want my feathers to meet (or “kiss,” as I call it) in the middle of each side. Here’s a shot of my ruler bent into the curve that I’ll be using:
Isn’t it amazing just how much that hyperquilting can add?!
The next step is to create the “bones” of the frame. Again, this is much easier than it might seem. I use a flexible curve ruler and place 1 end next to where I want to begin my feather and then I bend it into nice curves that will have my feather travel to where I want it to end. In this case, I want my feathers to meet (or “kiss,” as I call it) in the middle of each side. Here’s a shot of my ruler bent into the curve that I’ll be using:
 (You can flow feathers from many things, but if you are flowing them from another feather, know that it will always work to have a feather flow from between 2 plumes. Notice that the ruler is strategically placed between 2 plumes in the photo above.) I traced along the edge of this curve with a temporary marker, then repeated this on all 4 sides. Once done, I gently flipped my ruler over and then traced the mirror image curves on the opposite side of all 4 sides of the quilt. This creates a lovely flowing frame that surrounds the entire block. I couldn’t get a shot of the entire block that had enough detail to show the markings on all 4 sides, but you can get an idea of what I mean in this photo showing one side of the quilt:
 I know you don’t have much sense of a frame yet, but check back later this week for Part 2 of creating a feathered frame…!
buying viagra online from canada
Filed under
Free Motion Quilting.
June 13th, 2013
This quilt has been waiting in the wings for months. As I made it, I intended to quilt it myself, and even designed the center block to have lots of “blank space” so I could showcase some interesting quilting there. The more I worked on it, though, the more I realized that I really did not want to quilt this myself. In the first 6-8 months that I was learning about machine embroidery applique, I had this rare but very frustrating experience with my bobbin where the project would suddenly get sucked down into my bobbin case. When this happened, the only way to remove the hooped project from the machine was to literally cut it out…meaning that the project was ruined. I took my machine to the dealer and they ran my machine for days and days and could never reproduce that problem. She finally told me they didn’t know why it happened but maybe I needed to use a heavier weight fusible interfacing for the backside of my fabric blocks. So, that’s what I did and over the next several months, I embroidered many, many, many applique blocks with this mid-weight fusible interfacing. As it turns out, the problem I was having had nothing to do with the interfacing; it was totally operator error (i.e. me) and it was because I was winding my bobbins incorrectly. It was great to have that issue solved, but now I have about a bazillion really pretty applique blocks that are heavier than they should be. It’s not that big of a deal until you sew them together, and then you have a quilt top that weighs A TON!! (I’m not kidding, this quilt is really heavy!) On top of that, it is stiffer than normal and all of this makes it not very fun to quilt if you do sitdown, push-through quilting, especially if you work on a home domestic sewing machine. So, I am very happily having it quilted by Jenny Pedigo of the SewKindofWonderful blog. Her work is exquisite and it’s a huge relief to me not to have to push and pull this monster across my machine bed! Here are some shots of blocks in this quilt:
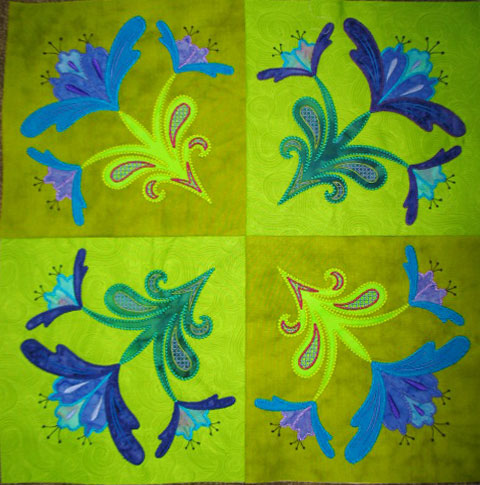
These large blocks are 17 1/2 inches square. They are made up of 4 smaller versions of Flower A set on point. Here’s a closeup of the MEA on Flower A:

This next block has 2 different versions of Flower C on it:
This is version 1:
…and this is version 2:
(The differences between them are in the way the “internal” designs are embroidered.) The next block is made by combining a swag wreath and a feathered wreath:
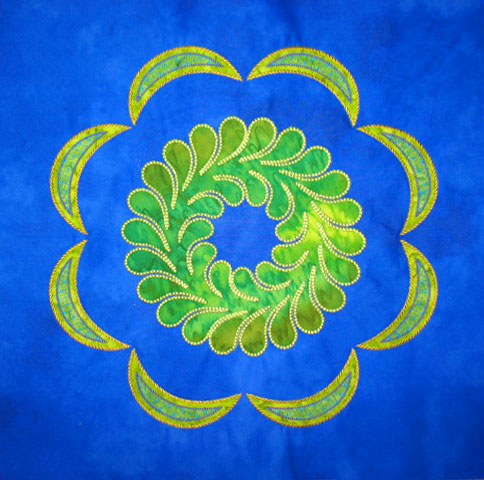
…and this is the center block:
And last but not least, here is a portion of a border. (My camera can’t get a wide enough shot of the full border and still have the picture capture any detail):
If you follow my blog, you know that I love to free motion quilt, so you may be asking yourself why I would send off a quilt to be quilted by a long arm quilter. Here are 3 reasons why I shipped this quilt off:
1. I can’t bear the thought of shoving that heavy quilt across my machine bed. Truly, there would be no joy in it for me, so what’s the point?
2. I am literally buried under all kinds of work I need to complete. Some of it is quilting, some of it is my medical job, and some of it is boring computer work that just needs to get done. I already have 5-6 quilts in varying stages of being quilted and it would be a good year before I could touch this one. I say that because there are many quilts in my head that haven’t been started yet and I would begin quilting those before I’d get to this one, simply because of not wanting to do it!
3. I can learn a lot of stuff by having this quilted by a professional quilter. That may sound odd, but it’s very, very true! Each of us brings our own “style” and “eye” to quilting and it’s good to get a different perspective on design. I absolutely LOVE Jenny Pedigo’s work (scroll backwards on her blog and oogle over the eye candy that her quilting is), and you’ll see what I mean. She has an incredible talent for dividing up blank space and creating something novel to quilt in that blank space. I am really curious to see what she creates.
Does a part of me feel kind of badly that I’m not 100% responsible for finishing this quilt? YES, no question about it! BUT, I need to get this quilt done and off my list so I can move on to the next thing and the relief of having it completed far outweighs the negative feelings. I’ll never be able to enter it in a competition but that’s fine with me. I’ll be the proud owner of a beautiful quilt that I designed, embroidered, and pieced and that’s good enough for me for this quilt!
paxil side effects women
Filed under
Machine Embroidered Applique.