

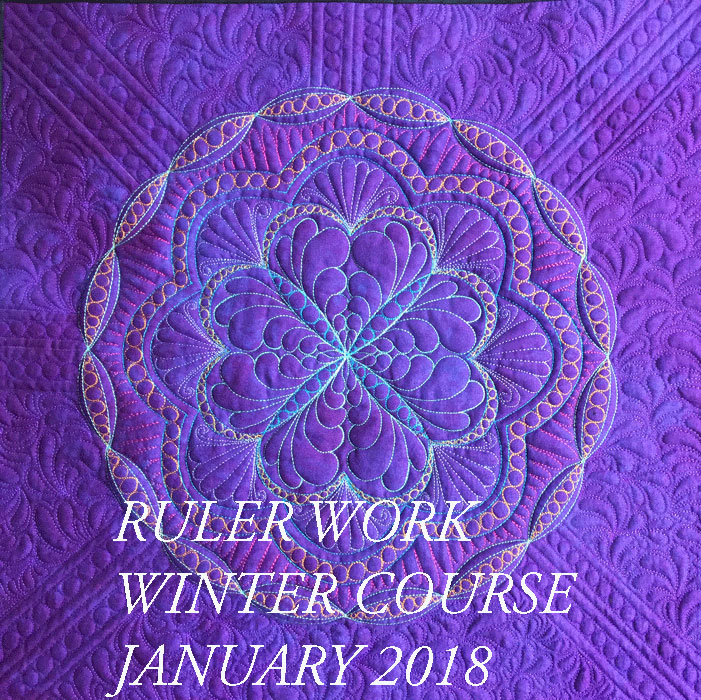
Jan 12 18
January 2018 Ruler Work Winter Course Part IV
We meet yet again! This is the 4th ruler work lesson and if you missed lesson #1, lesson #2, or lesson #3, you’ll want to go back and read those lessons and also complete the ruler work exercises that go with each lesson. Know that each lesson builds on the preceding lessons, so it’s to your benefit to complete them in order. Your time and my time are valuable, so I won’t keep repeating the same information in each post. You can find the earlier lessons by clicking on the links below:
If you find yourself struggling with these lessons, or just want to start truly at the basics of ruler work, you may find our ruler work DVD helpful. It’s called “Ruler Work for the Sit Down Quilter Volume I, ” and you can find it by clicking here. These ruler work lessons are quite different than what is on that DVD. This blog-based ruler work course presumes you already know some basic ruler work info, so if you are feeling a little lost, this really might help you.
In our last lesson, you learned how to create tapered channels using an arc ruler and today, you’ll learn how to create a different type of tapered channel using an arc ruler. I will be using my PTD 12 arc ruler for this lesson, but use whatever arc ruler you have lying around. We will be working inside the 4 inch wide border that lies just below the 1 3/4 inch wide border we filled during our last exercise.
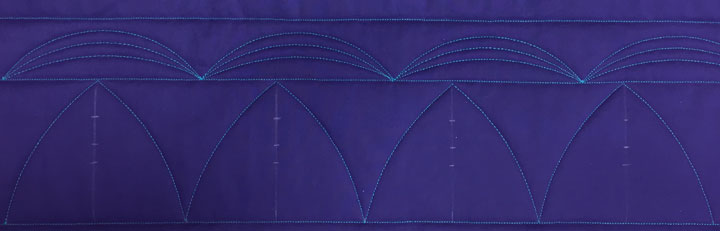
Below is a photo of the ruler work framework we will be completing today:
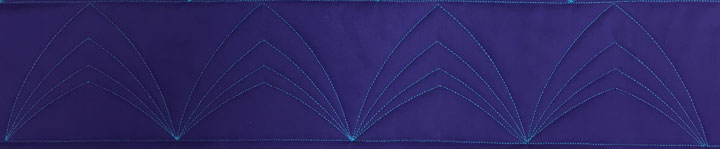
Know that this is what I call an arched swag border. It’s very similar to a swag border, but each swag comes to a point at its apex. (Compare this to the last swag border we did where there was no central apex. Those were just tiers of pleasing curves that never came to a “point.”)
This is a very easy type of design to stitch and learning to stitched arched swags will help you accomplish a lot of work more easily and quickly. I say this because we have, in essence, made the ruler work framework much easier to stitch because it has been broken into 2 short curves instead of 1 plunging curve that must be repeated in 2 directions. If this doesn’t seem intuitive to you, find yourself a true swag ruler with a similar plunge and try stitching with it and not moving that ruler’s position against the quilt from start to finish. This is much harder to do as a sit-down quilter (because remember, you’re moving a big quilt as well), so arched swag designs have really become my go-to designs. They will deliver “big time” as far as a design punch, yet they are easier to stitch than a true plunging swag design that is stitched as one continuous line per swag.
To begin, let’s place some markings inside this border to guide our stitching. Place a tick mark 1 inch inside the left side of the base of the border, then place a tick mark every 5 inches. Next, place a vertical line that is perpendicular to the baseline at 2.5 inches from the first tick mark, then repeat this vertical line every 5 inches. Your sandwich should now look like this:
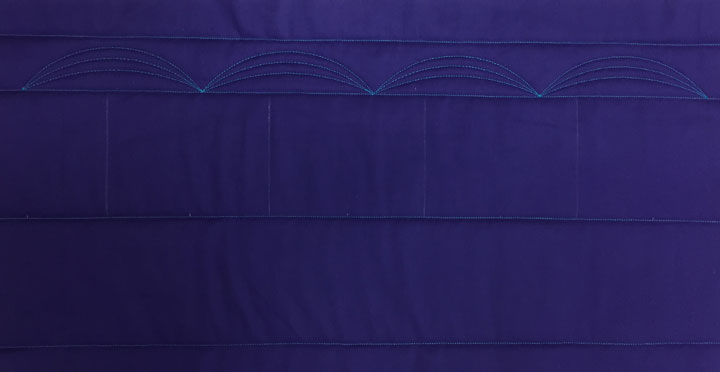
Hopefully, stitching this series of “parent arched swags” looks familiar from prior markings. You’ll pierce your needle at the base of the border at the first tick mark, then stitch to the intersection of the apex of the soap line, change your ruler position, then stitch back to the next tick mark that falls on the baseline. Repeat that for all 4 arched swag “units” on your border, and your sandwich should look like the photo below:
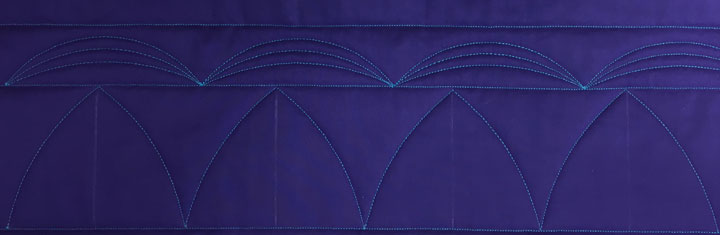
Check that your perpendicular lines really do hit the apex of each arched swag and create a new perpendicular line if they do not. Add a small tick mark at 1 inch, 1 3/4 inch, and 2 1/4 inches along the vertical lines below the stitching at the apex. Do this for each arched swag “unit,” and recall that you are merely establishing new starting and stopping points for your stitching. Your marked sandwich should now look like the photo below:
(Hopefully, you are having a bit of a deja-vu back to when we marked a design for tapered channels using a straight line ruler in lesson 1.)
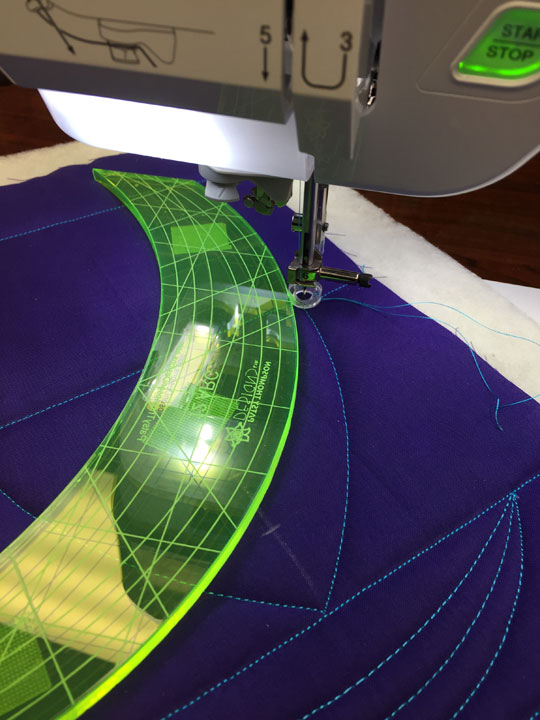
Pierce your needle at the very beginning of of your current border design at its base, and this is what my set up looked like as I was preparing to stitch this next round of tapered channels:
Go ahead and stitch each of these, re-positioning your ruler, (and pivoting your quilt if you’d like), each time you hit the next tick mark. Once the border has been stitched, your sandwich should look something like this:
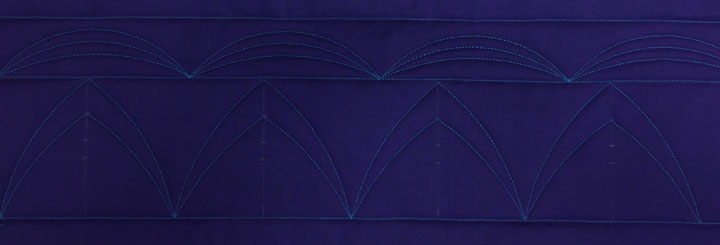
Go ahead and finish stitching the remaining 2 lines that will create even more channels and when you are done, your sandwich should look like this:

If we examine it, there are 3 tapered channels and a triangle at the base. Could we fill some or all of these channels? Yes. Know, however, that it is usually more impactful to fill only some of the channels. By deliberately leaving every other channel empty, you create more textural/design interest, and it also saves you time. This leads us to Patsy’s golden rule #3:
Avoid the temptation to fill all channels inside a given design. The juxtaposition of a filled channel next to an unfilled channel is a subtle way of making your quilted design more interesting and drawing the viewer’s attention to it.
Let’s talk a bit about arched swag designs in general because this is a particularly useful quilting design. Remember that you can always alter the “look” or “feel” of a given design by playing with scale. Arched swag border designs become far more impactful as they increase in size, and this is mainly because you can “subdivide the real estate” underneath the arched swag in so many different ways. I make a lot of quilts that have 4 1/2- 5 inch wide borders, so I play around a lot with arched swag designs that would fit those border widths. By increasing the length of each arched border swag “unit,” I dramatically increase the “real estate” underneath the parent arched swag, and this means there is much more room to play with. Here’s an example of what I mean:
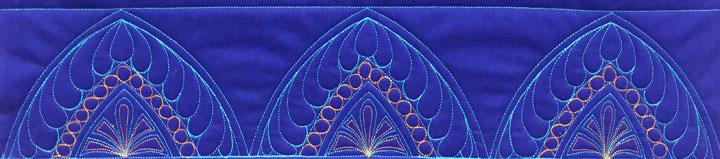
That first arched swag border design is composed of a series of parallel channels underneath the parent arched swag “unit.”(coming up in the next lesson). Contrast that idea with the arched swag border design below that merges parallel channels and tapered channels within the same ached swag border:

…and this one is the same ruler work framework as the last arched swag border design, but it’s filled differently:

I hope this is giving you a sense of how much fun it is to play around with arched swag designs. The examples I’ve shown you today are all used in border designs, but you’ll see that arched swags can be used for much more than that. Rest up over the next few days because I’m going to really push you in the next lesson…
Thank you Patsy. Great lesson and tips. #CreativeGoodness.
QuiltShopGal
http://www.quiltshopgal.com
Thank you Patsy, I am really enjoying going over these techniques.
Thanks again. I think I will try these in small samplers before tackling a large quilt. This is. So much fun !!
I’ve got a basic ruler and was ready to get going but didn’t really know where to start so these lessons have come at just the right time. I’m having so much fun. Should I practise my own infils on these samples or will you be coming back to them at a later date with some suggestions? Thank you
So sorry to hear about your family emergency Patsy. Take your time, I’m sure we will all be waiting patiently for your return.
I am so enjoying these lessons and so grateful for all your efforts. I love the orderly approach and the building of new skills on old. Wonderful class! Wonderful teacher!
Best wishes from England
I only have a limited amount of info I can cover within a given lesson, so if I feel like I have space to cover fill designs, I cover them in that lesson. When I say “feel free to fill them in if you wish,” it means I won’t be covering fill des
I won’t have time to come back and cover fill designs for this tapered swag design, so feel free to play with filling them if you’d like!
Excellent instruction Patsy…..you ROCK!
LuAnn in Oregon
luannkessi.blogspot.com
Patsy, As each lesson builds upon the previous, so does my excitement to put these lessons into action on a quilt. I completed lessons 1 & 2 so far and love how they turned out. I plan to do lessons 3 & 4 today. I will certainly be keeping my “class” samples to refer back to when I need quilting ideas in the future.
June in AZ
very interesting. Thank you