

Jan 15 18
January 2018 Ruler Work Winter Course Part V
Today we hit the halfway point on this ruler work journey together! This will be the last lesson where I’m laying down basic ruler work skills, so know that the lessons will be different after today. (They will still be great, but they will force you to use the skills we’ve covered thus far in ways you might not think of, so it will be fun !) These first 5 lessons really are the basis of pretty much everything I do in the world of ruler work, so if you see me doing something down the road and can’t understand how I did it, come back to these first 5 lessons as the info will be here. Know that each lesson builds on the preceding lessons, so it’s to your benefit to complete them in order. Your time and my time are valuable, so I won’t keep repeating the same information in each post. You can find the earlier lessons by clicking on the links below:
In our last 2 lessons, you learned how to create tapered channels using an arc ruler and today, you’ll learn how to create parallel channels using an arc ruler. This is very similar to creating parallel channels with a straight line ruler, so this should prove pretty easy for you. I will be using my PTD 12 arc ruler for this, but use whatever arc ruler you have lying around. We will be working inside the lower 4 inch wide border on the sandwich you made earlier.
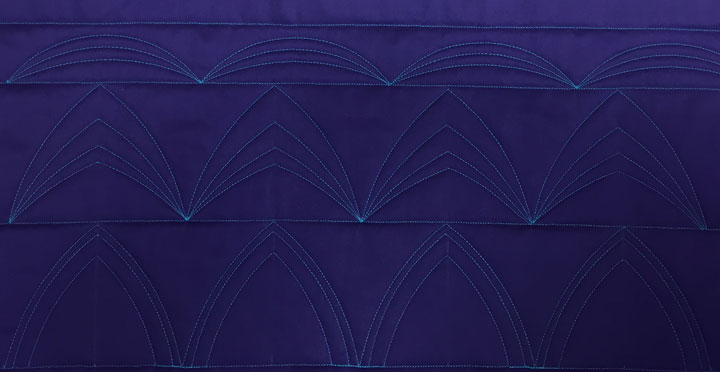
Below is a photo of the ruler work framework we will be completing today:

…and here is a shot of what it might look like once filled:

Each of these arched swag “units” is 5 inches wide and 4 inches tall. I am using my PTD 12 arc ruler for this, but use whatever arc ruler you have available. As always, we’ll begin by marking some tick marks to guide our stitching. Using a temporary marker, place one tick mark at the base of the border zone at least 1 inch to the left of the fabric’s edge. Place a similar tick mark every 5 inches thereafter. Next, mark a vertical line 2.5 inches from the left-most tick mark, then repeat that line every 5 inches. Your sandwich should now appear as follows:
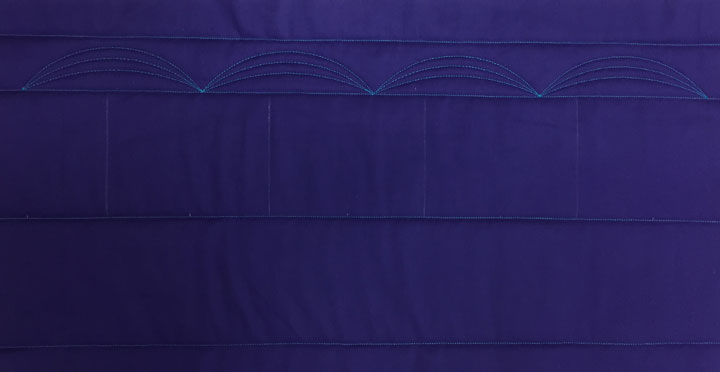
The first run will be identical to our last exercise. Pierce your needle at the base of the border on the first tick mark, then position your ruler to stitch to the apex of the neighboring vertical line. Now, re-position your ruler and stitch the next curve that will take you back to the baseline, then stitch the remaining parent arched swags in this border. Once done, your sandwich should appear as below:
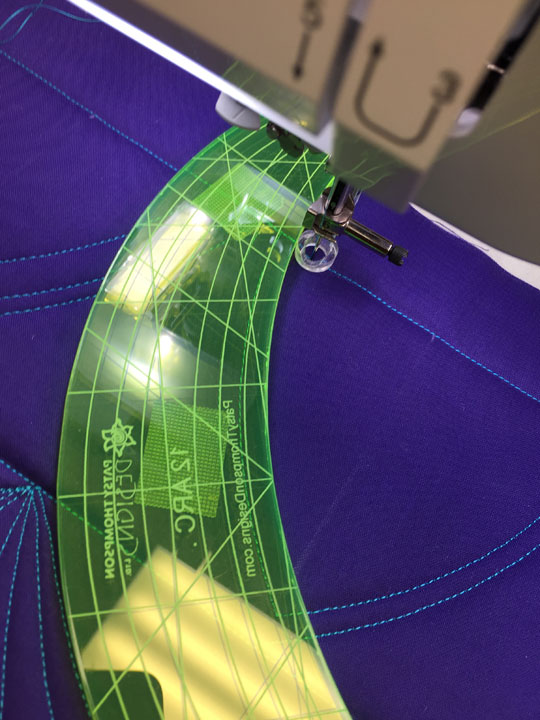
We’ll place a 1/4 inch parallel channel inside each parent arched swag. Remember there is no need for further marking as we can rely on the etched lines on the ruler to guide us in creating parallel channels. To create a 1/4 in parallel channel, you’ll simply place your arch ruler edge right up against the stitched line you just stitched, and this will give you a 1/4 inch wide channel. Here is a shot of my setup just before I began stitching:

Once your stitching reaches the vertical soap line, stop stitching and re-adjust your ruler, then keep going. Complete those 1/4 inch channels for the entire border and your sandwich should appear as below:
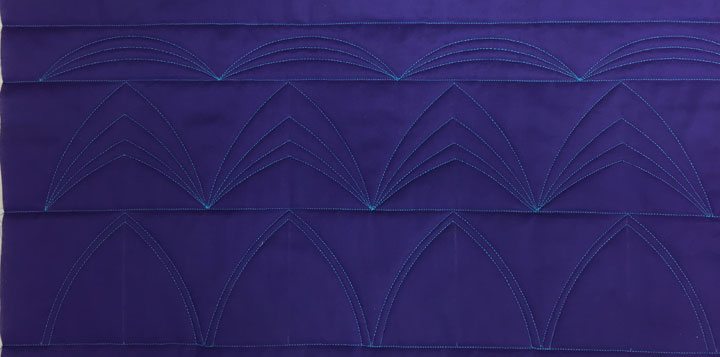
Next up, we’ll add a 1/2 inch wide channel inside each arched swag. You’ll need to enter 1/2 inch inside the innermost arched swag at the end, then place the first etched line on your ruler directly over that stitched line. Here is a shot of my setup before I began stitching:
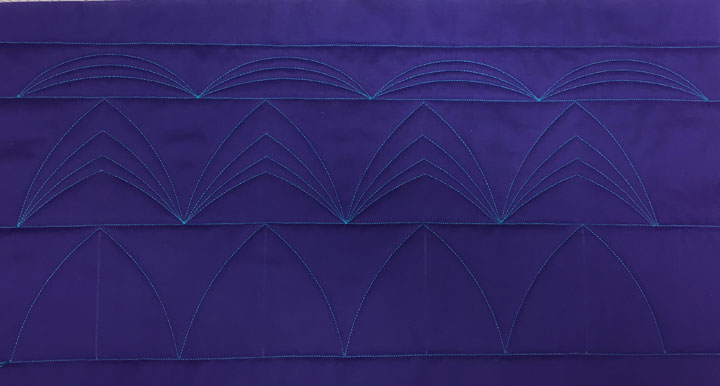
Stitch those out and your sandwich should appear as below:
Throw in your final 1/4 inch wide channel, and your framework is complete:
Now we are ready to fill in some channels. Remember that the 1/4 inch channels are too narrow to hold anything, so those 2 channels will remain empty. I added a single row of pearls into the 1/2 inch channel and a featherette into the bottom triangular area. Here is a shot of these filled in:
![]()
Do you see the mauve-colored structures in the base of each arched swag? Those are called featherettes. We’ll talk more about them below, but before we get to that topic, this last shot shows the border design after the featherettes have been hyperquilted with gold polyester thread:
When you hyperquilt a quilted design, it adds a bit of flair, or a highlight, especially if it’s stitched in a high contrast thread. For feathers and featherettes, it always creates areas that are almost “electrified” if you use a gold or silver rayon or polyester thread. This is because you have to repeatedly bring your stitching line back to the spine (in a feather), or back to a center base (in a featherette.) Having these areas where there is increased density of thread being laid down is what causes the highlighting. In general, if you have a border design that you like but you think it’s a bit ho-hum, think of hyperquilting a section of it because it will almost always bring that design newfound life!
Of course, there are many ways these channels and spaces could be filled, so choose something else that appeals to you if you are turned off by the thought of a featherette. I am betting that many of you are intimidated by the thought of a featherette, but this is something that’s really worth trying because it will add a sophistication to your ruler work. Many people find a basic featherette easier to stitch than a feather, so many people learn to stitch feathers because they’ve mastered a featherette. I’m going to give you the basics of featherettes below, but spend some time looking at the photo of a basic featherette above as you try to understand these concepts:
- There is a difference between a featherette and a feather. In a feather, the plumes all flow from a spine. In a featherette, the plumes all flow from a single point, OR the plumes flow from a structure that is not a spine. Can you see that the plumes in the photo above all flow from a point at the center base of the triangular zone? (They do, and this makes featherettes easy to stitch, because you are repeatedly bringing your thread line back to that same point.)
- A featherette is nearly always highly symmetric, either from side to side or top to bottom or all of the above. In the featherette above, there is a central plume and then the side plumes on either side are roughly symmetric. How in the world can you do that kind of freehand work?????? See below, and play with this by drawing on scrap paper. Drawing will teach you a lot about proportion and shapes of plumes. (I know, I can hear you groaning “but I can’t draw!” Trust me, I couldn’t draw before either. The more you do it, the better you get!)
For me, the easiest way to build “featherette skills” is to draw a few isoscoles triangles on a piece of scrap paper. (An isosceles triangle has 2 sides that are equal.) If you look at the space created with ruler work that holds each featherette above, can you see that the space is actually is a triangle? If you go intro the challenge of drawing a freehand featherette with the goal of filling the entire space inside the triangle with plumes, it’s not so hard to do this. Begin by drawing a teardrop whose base is in the dead center of the triangle and stretch that teardrop/plume so it reaches the top of the center of that space, then carry the pencil all the way back to the center base again. Now swing up and out and to the right and draw a “hook” shape that eventually meets up w/that center plume. Carefully backtrack just a bit over the “tip” of the hook you’ve just stitched, then swing out to the right and down to that center base point again, and you’ve just added another plume. If you are working inside a triangle that is roughly the same size as the triangle inside the ruler work arched swag you should have space for 1 more plume on that first side. I would sneak out, creeping along then next to the baseline, then swing up and stitch the final hook shape. Now you can carefully backtrack down your already stitched line to arrive back at the center point. Once there, you can repeat the same process on the opposite side.
*****The key to this coming out and appearing symmetric is that you are filling the exact same shape on either side of that center plume. So, if you hold yourself “accountable” to stretching/contracting your plumes so they fill the entire space, you should end up with a featherette that is symmetric! If there is a part of you wondering if this is using the bumpback feather technique, you are correct!
I’m not going to repeat previous posts here, but if you’re wanting to learn how to quilt various featherettes, you can find an old post by clicking here.
There’s a lot of info in this post and if you’re feeling overwhelmed, skip the featherette part and stitch with creating the ruler work framework. Patience, grasshopper!
Brilliant once again! Many thanks Patsy.
Thank you so much for doing this course! I am enjoying it immensely and learning SO much. I’m no longer as intimidated by the rulers.
Hi Patsy– I wanted you to know that I demonstrated using your arc rulers to make border designs for my quilt group yesterday. Everyone was very impressed. I was in your class in Ann Arbor last summer where you showed us how to do these border designs. I am really enjoying your weekly blog posts, because hey are reinforcing what I learned from you then. Will you be showing how to use your flower/mandela ruler in future posts? I just love how these designs work out and would like to make one. Or maybe I need to purchase your second ruler work DVD? Anyway, thanks for all he great instruction. Robbi Imhoff