

Jan 19 18
January 2018 Ruler Work Winter Course Part VI
Welcome to lesson #6! I’m glad you’ve made it this far, as today’s lesson will hopefully take the skills you have learned and place them into the realm of practical use. You can do today’s lesson on paper or on fabric, but I will be demonstrating it on paper because that is how I would handle the situation in “real life.” My goal here is to show you how to solve these problems when you are dealing with a “real quilt” and trying to figure out dimensions. Do not be put off by the mundane/boring nature of today’s lesson as this is the info that will allow you to use the skills you’ve been learning. Sometimes, it pays off to read through “dry material” and I’m hoping you will find this worth your time.
You really do need to know what’s been covered so far in order to reap the rewards of today’s lesson, as all of these lessons build on preceding lessons. Clicking on any of the links below will take you to the earlier lessons:
OK, let’s get right to it! To date, you have been creating various ruler work border designs because I’ve been feeding you specific dimensions that determine placement of your tick marks, and those tick marks determine the proportions of the final design. One of the most wonderful things about ruler work is that it gives you the ability to customize a given design to fit exactly on your quilt. If you really like that design and decide you want to use it again on a different quilt, you can easily “adapt” that design so it has been customized to fit exactly on that second quilt. You will discover that this versatility is extremely useful.
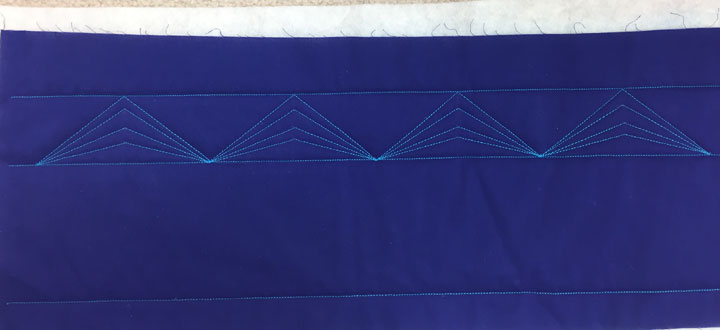
Let’s look at a typical border that needs to be filled. Let’s say that you have a 2 1/2 inch wide x 34 1/2 inch long border on a quilt that you want to fill with a ruler work design. Let’s pretend that we want to fill that border with the design we learned in lesson #1. To trigger your memory, the photo below shows this design made with the original proportions:
Recall that the dimensions for each “unit” of this design were 2 inch by 5 inches. If we were to keep the length of each unit at 5 inches, then we would have room for 34.5 divided by 5 = 6.9 units. Well, we can’t have 6.9 repetitions of that design can we? So, this means I could either have 7 repetitions of a 4.93 long unit (I got this number by taking 34.5 and dividing by 7), OR we could have 6 repetitions of a 5.75 inch long unit (I arrived at that by dividing 34.5 by 6.) To see if either of these would be aesthetically pleasing, we need to test this on a piece of scrap paper. First, I would create an empty 2 1/2 inch wide border zone on that paper. I have created 2 separate zones below as my paper isn’t wide enough to hold both options inside the same line:
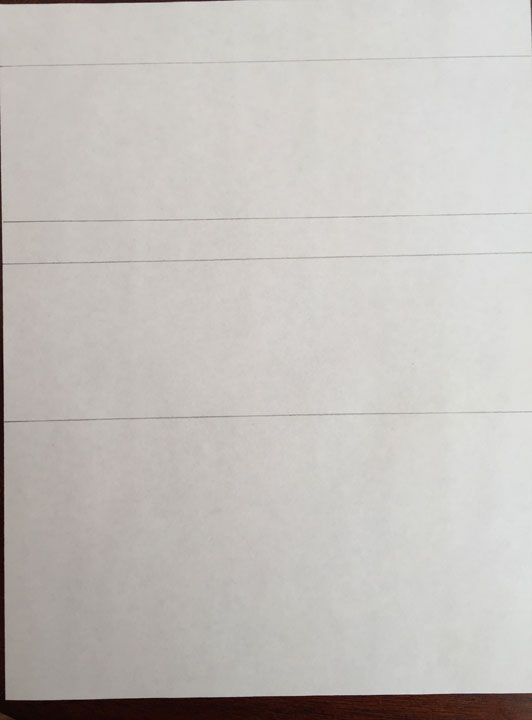
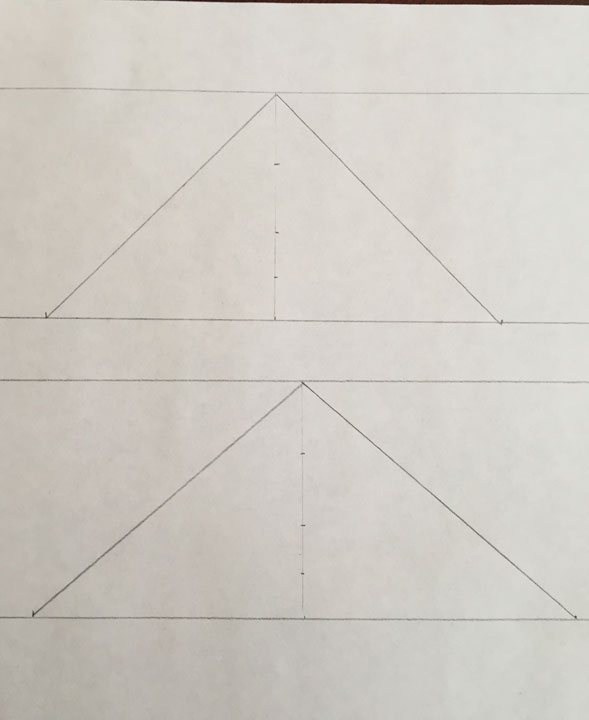
Next, I am placing a tick mark at my “zero position,” then another tick mark at just slightly greater than 4 7/8 inches for option #1. On my second border, I have another zero tick mark and then a tick mark at 5.75 inches. This allows me to create a sample of a unit of the border design at each of the 2 lengths discussed above. Next, I place a vertical line at the midpoint of each of those units, and my paper appears as below:
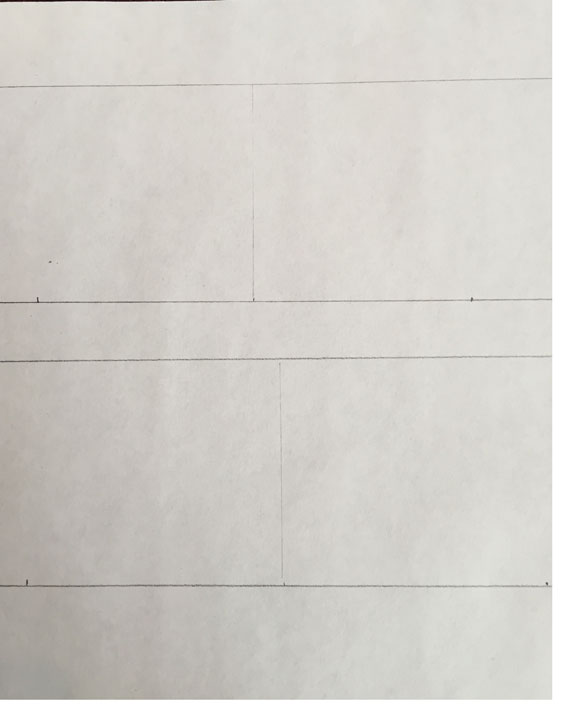
Draw that first parent triangle for each sample and then look at what you’ve drawn. Recall that this design is a series of triangles with tapered straight line channels, but our original border was 2 inches wide and this new border on your real quilt is 2 1/2 inches wide, so these new triangles are 25% wider than the earlier design. If we stick with “inner triangles” of the original height, they won’t look quite right, so we need to play with the proportions of these new “inner triangles.” For me, the easiest (and fastest) way to do this is to lay my ruler next to that center vertical line and just kind of “eyeball” what might look good. For this size, I am choosing to place a tick mark at 3/4 inches, 1 1/2 inches, and 2 inches below the apex of the parent triangle. Do I know this will look good? No, but I’m pretty sure it will. (At some point, you need to learn to take chances and trust your instincts. Remember, if this drawn sample looks awful, you will learn something from that, and over time, it’s these successes and failures that will build your confidence in making these kinds of guesses. This is also just a piece of paper, so if it looks awful, you’ll try again on another piece of paper!) This is what my paper looks like before I draw any more triangles:
…and here is the paper after both samples have been drawn:
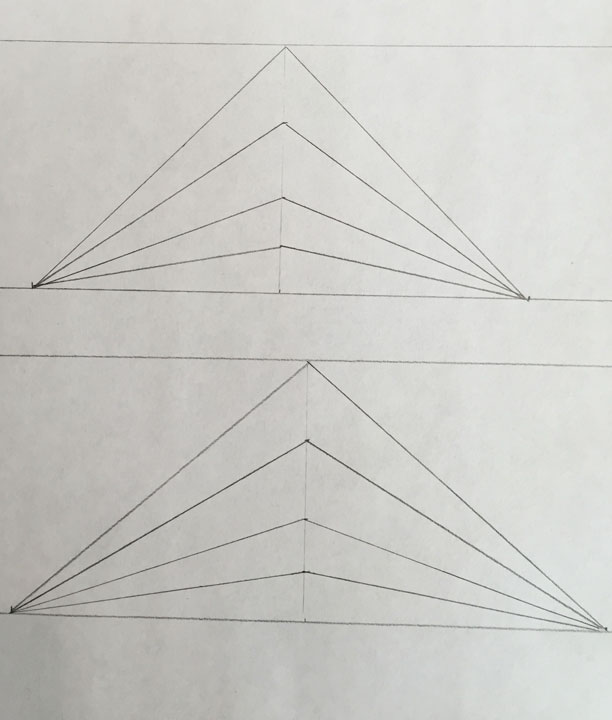
I believe that either one of these would be fine, but I’m going to choose the 5.75 version for 2 reasons:
- I like the proportions a little bit better, AND
2. This size will be less work for me since it has less repeats, so I know I can stitch it out faster.
So, after my little “experiment,” I have determined that my new prototype unit will be 2 1/2 inches high and 5.75 inches long. We’re almost done, but once I’ve determined my “prototype” proportions, there is one more step to take before marking the border zone. You must measure each of the 4 sides of the border individually and then mark them individually. The likelihood that all 4 sides will be the exact same length is very low, (for me, it would be 0%), so go into the process assuming they are all just a bit different. You will then need to calculate the width of each repeat for each of the 4 sides. (You would do this by taking the measured length and dividing by 6, since we have determined above that we will be having 6 repeats.) It may well work out that the differences in the size of the units will be inconsequential, but sometimes they are not. It’s always safest to work in a way that will cover you in situations where those differences are consequential! What you are really doing here is avoiding the trap of using the measurements from side #1 on side #2, and finding out that a difference of 1/8 of an inch added up 5 times (0ver 5 repeats) might leave you with a final triangle unit that is 5/8 inch longer or shorter than every other triangle unit in that side of the border. This additive effect creates enough of a difference that it would be noticeable, but if you spread out that difference among each unit in a given side, the world will believe that each unit on all 4 sides of the border is the same length. That is the rationale for measuring each side individually and calculating the length of each unit for each side individually.
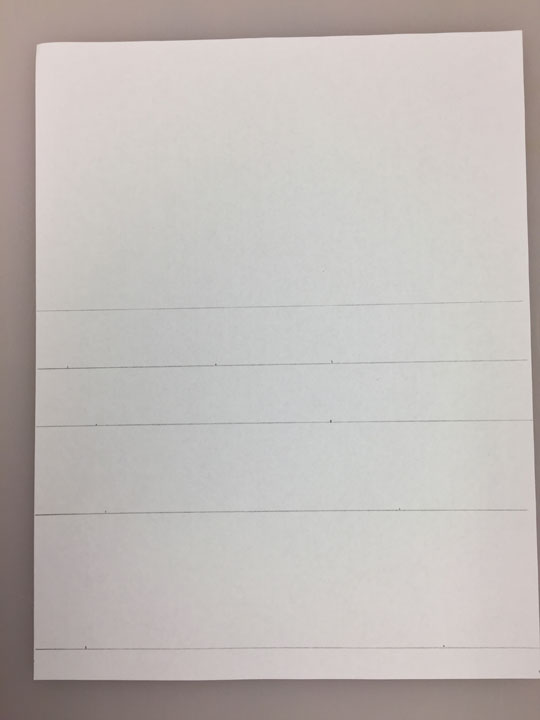
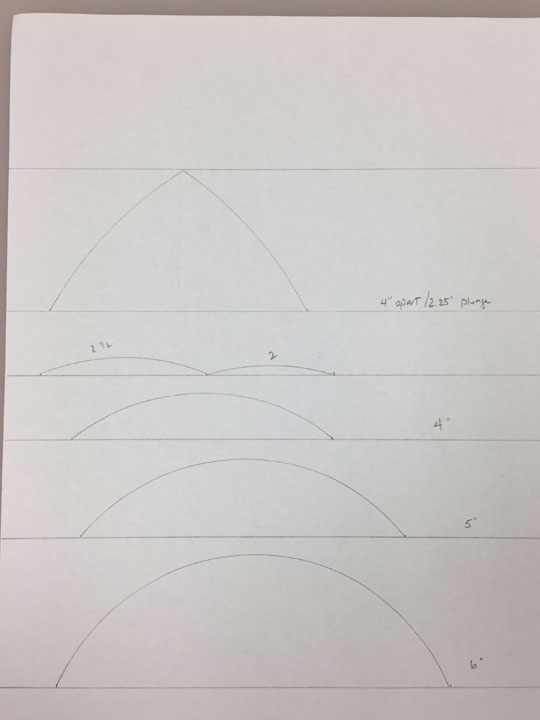
Now, let’s say that we were working on filling this border with a swag ruler work design, would this be as fast and easy? No, but it wouldn’t be hard. Remember that when you are working with arc rulers, you will alter the depth of the curve’s plunge into the border space every time you alter the length of each swag. To illustrate this, take an 8 1/2 x 11 in piece of scrap paper and orient the paper in portrait orientation. Beginning 1/2 inches above the bottom of the paper, draw a horizontal line across from the left side to the right side. Next, mark a parallel line 2.25 in above that line, then 1.5 inches above the 2nd line, then 1 inch above the 3rd line, and lastly 2.25 inches above the 4th line. (We have just created a series of border spaces of different widths.)
Now, beginning at your lowest line and then working upward, make a tick mark at 0 and 6 in; 0 and 5 inches; 0 and 4 inches. On your next line up, mark a tick mark at 1, 2.5, and 4.5 inches. Your paper should now look like this:
Now, I am using my PTD 6.5 arc for this exercise and I’ve chosen it because it has the most dramatic curve of the 3 arc rulers in the PTD starter pack. Using the tick marks on each line, I am tracing my swags and this is what I get:
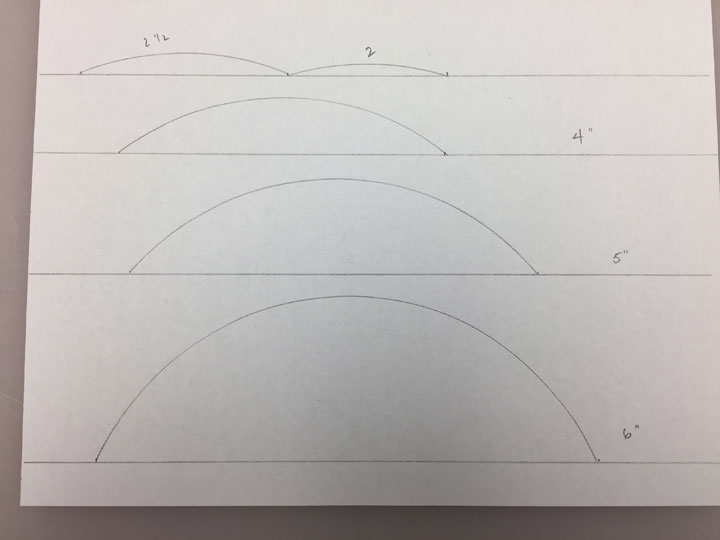
What I’m trying to show you is what happens with the depth of the plunge of the curve as you alter the length of a given swag. Remember, you will need to play around with lengths of swags as you determine the ideal swag length for that special border on your real quilt. Is there a way to work around this? I know of two ways:
1. Begin building your stash of arc rulers
2. Switch to a border composed of arched swags instead of pure swags. This will resolve these issues completely since you have complete control of how deep of a plunge your arched swag will make by virtue of where you place your tick marks.
In the photo below, you can see how I’ve made a very “plunging” arched swag using a 4 inch long unit. If you compare this to the depth of the swag we were able to make using a 4 inch long unit earlier, there is a huge difference.
OK, that’s it for today and that’s it for the “dry/mundane/boring posts!” The final 3 posts will have you stitching again but using your skills in a very different way. Prepare to have a ton of fun and to realize you have skills that will take you to very fun places and to beautiful design work!
Another great lesson. Thank you.
Patsy, thank you for doing this series. It is really pulling together things that I knew but didn’t quite get how to put it all together. The light bulb has gone off and I can’t wait to use this in one of my projects.
These lessons are priceless. Your a treasure Patsy. Sincerely, thank you.
Thanks, Patsy. This is the info I have been needing. Like all crafting skills it needs lots of practice to be able to become confident in decision making. Thank you so much.
Hi Patsy, I have just read through the lesson a 2nd time and now understand the processes even better. However, I have a question – How do you turn corners? Maybe I am jumping ahead and you will address this in a future lesson. Thank you.
Great lesson Patsy! While the math might not be a lot of fun, I can see where giving a little thought to planning borders in advance
will result in better results. Very easy really…..once I drew it out. Great tip also to measure each border individually & adjust the size of the swags accordingly. Loving these lessons! Thank you!!